Steps
Check which Express Entry program you may qualify for
Express Entry manages three programs, each with its own minimum rules for language, type and amount of skilled work experience, job offers and education. Start by comparing them and finding the NOC code for each job you have held.
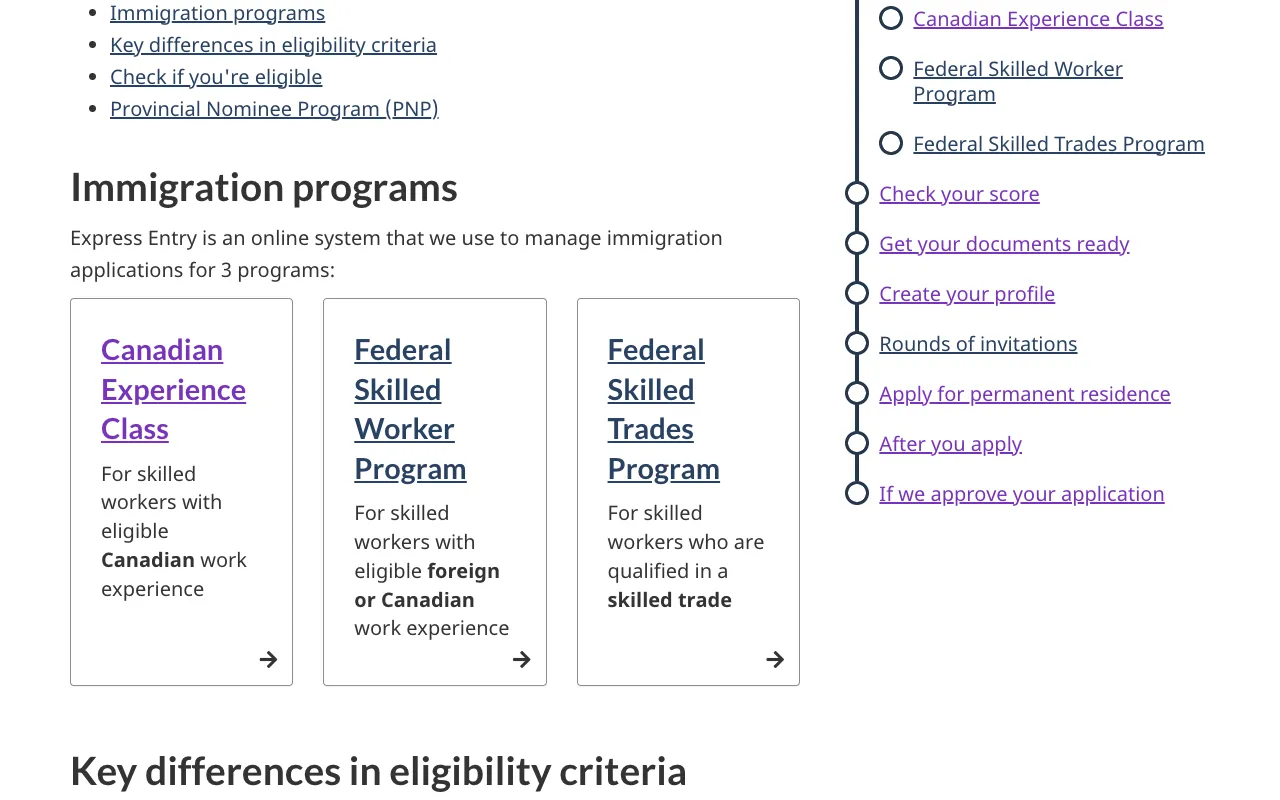
IRCC page · Express Entry: Who can apply · Whole page · Live page - The three programs are the Canadian Experience Class (Canadian work experience), the Federal Skilled Worker Program (foreign or Canadian work experience) and the Federal Skilled Trades Program (qualified skilled trades).
- Work experience is measured with the National Occupational Classification (NOC) 2021 and its TEER categories. Skilled work generally means TEER 0, 1, 2 or 3. The trades program covers only certain trade groups.
- For each job, pick the NOC whose lead statement and main duties match what you actually did, not just your job title.
- Minimum work experience differs. For the Canadian Experience Class it is 1 year in Canada within the last 3 years. For the Federal Skilled Worker Program it is 1 year of continuous experience within the last 10 years. For the Federal Skilled Trades Program it is 2 years within the last 5 years.
- The Federal Skilled Worker Program also uses a 100-point selection grid, and you need at least 67 points to qualify.
- The Federal Skilled Trades Program needs either a valid job offer or a Canadian certificate of qualification in your trade.
- All three programs require that you plan to live outside Quebec, which selects its own skilled workers. Provincial nominees must settle in the province or territory that nominated them.
Take an approved language test
Every Express Entry candidate must prove English or French ability with an IRCC-approved test, even native speakers. The results go into your profile and must still be valid when you submit your application.
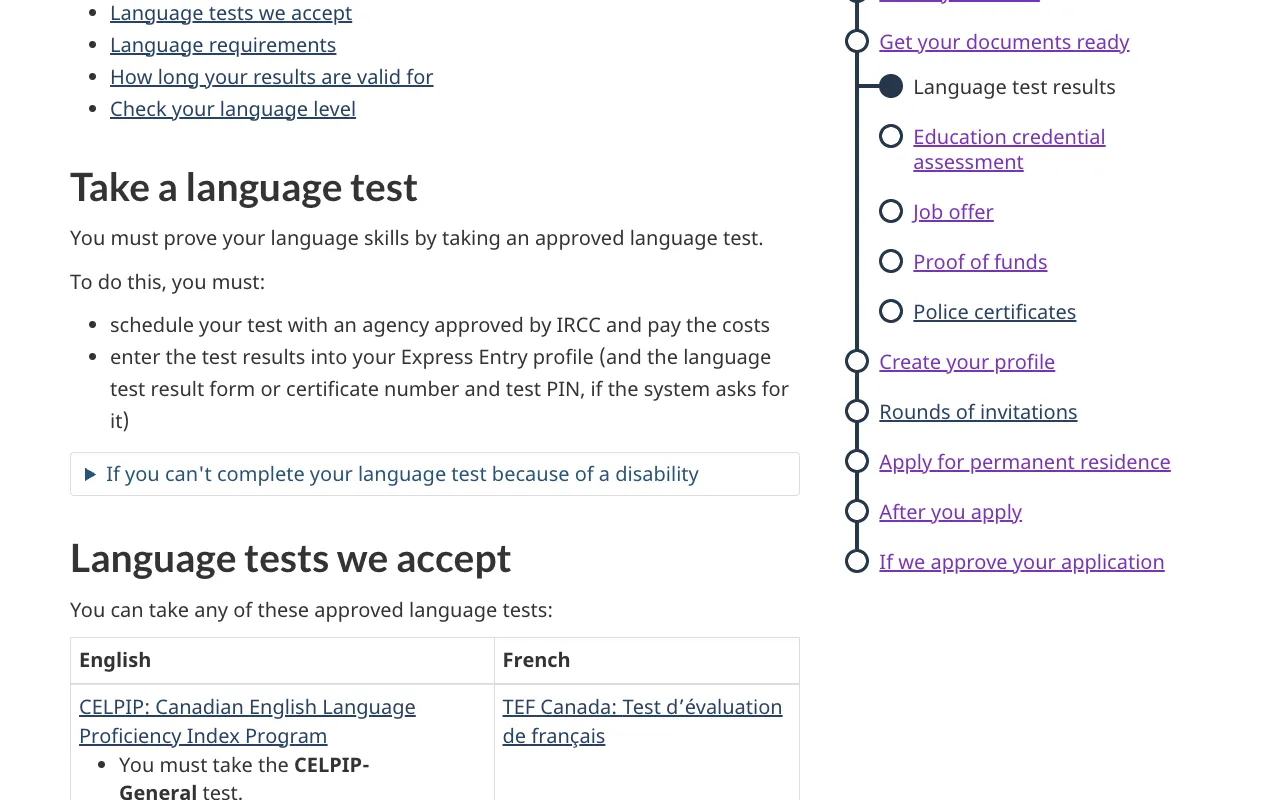
IRCC page · Express Entry: Language test results · Whole page · Live page - Approved tests: CELPIP (General test only), IELTS (General Training only, and IELTS One Skill Retake is not accepted), PTE Core, TEF Canada and TCF Canada.
- Results are converted to Canadian Language Benchmarks (CLB) for English or NCLC for French. Program minimums range from CLB 4 to CLB 7 depending on the program, the ability and (for the Canadian Experience Class) the TEER of your job.
- Results must be less than 2 years old both when you complete your profile and when you submit your permanent residence application. IRCC refuses applications that use expired results.
- TEF Canada takers must enter the scores from the column IRCC specifies (the “Équivalence ancien score”), not the “Score / 699” column.
- If a disability prevents you from completing part of a test, IRCC explains how to get averaged scores through its language averaging tool.
Get an Educational Credential Assessment (ECA) if you studied outside Canada
An ECA for immigration purposes shows what your foreign degree, diploma or certificate is equal to in Canada. It is required for Federal Skilled Worker principal applicants with foreign education, and it is the only way to get points for education completed outside Canada.
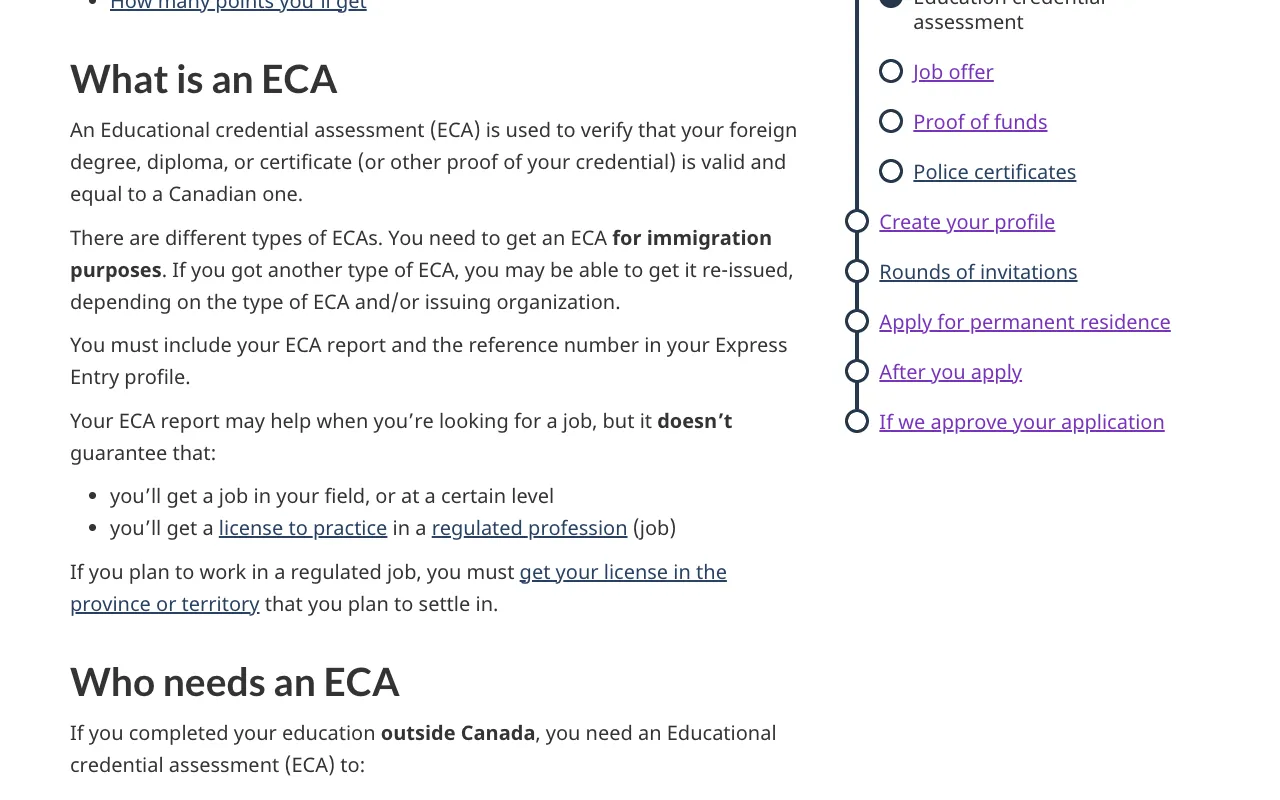
IRCC page · Educational credential assessment · Whole page · Live page - Use an organization or professional body designated by IRCC. Architects, doctors and pharmacists in certain NOCs must use a specific professional body.
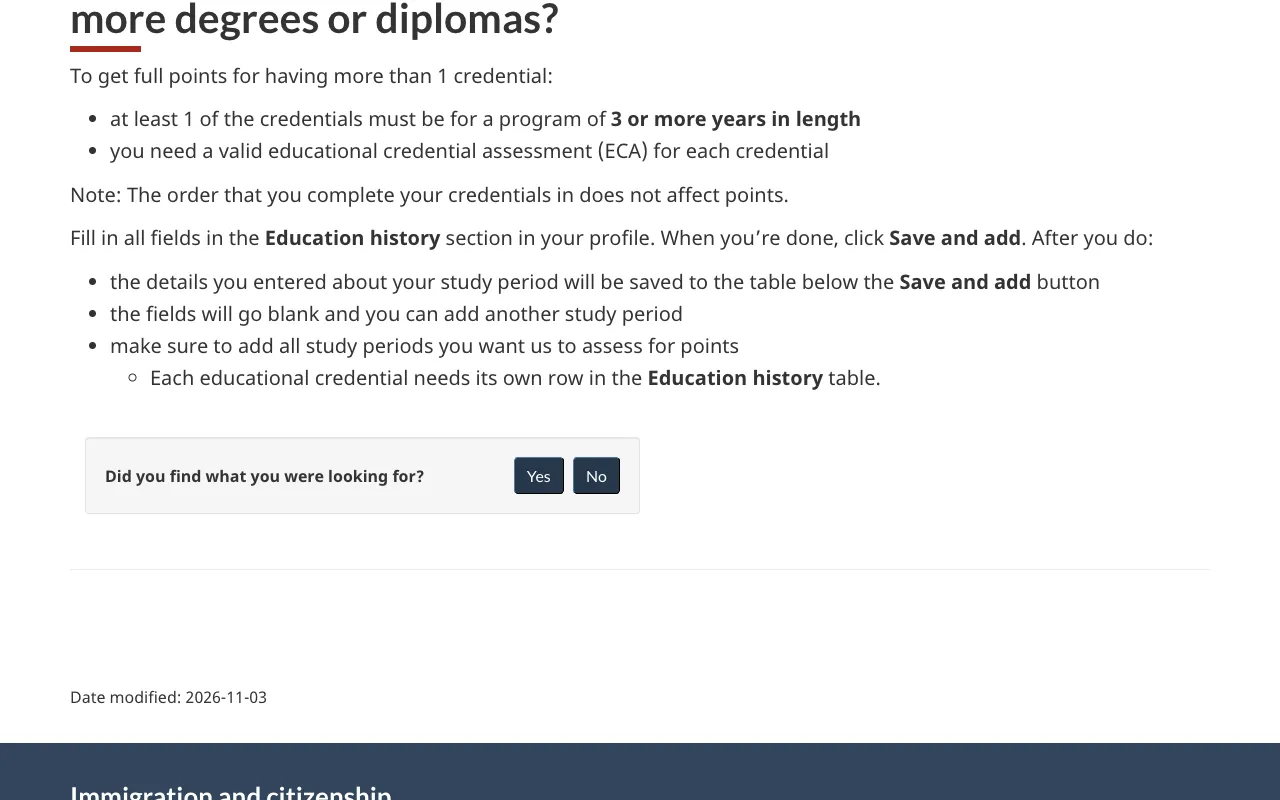
- Usually you only need your highest credential assessed. To get full points for two or more credentials, each one needs an ECA, and at least one must be for a program of 3 or more years.
- The ECA must be less than 5 years old when you complete your profile and when you submit your application. IRCC refuses applications that use an expired ECA.
- Enter the result and the ECA reference number in your profile, keep your original documents, and be ready to upload copies if invited.
- You do not need an ECA for a Canadian degree, diploma or certificate. An accompanying spouse or partner can also earn points for their education.
Gather the information and documents your profile needs
Before you start the online profile, collect the details IRCC will ask about. Start long-lead items, especially police certificates, early, because you will need them within 60 days if you are invited.
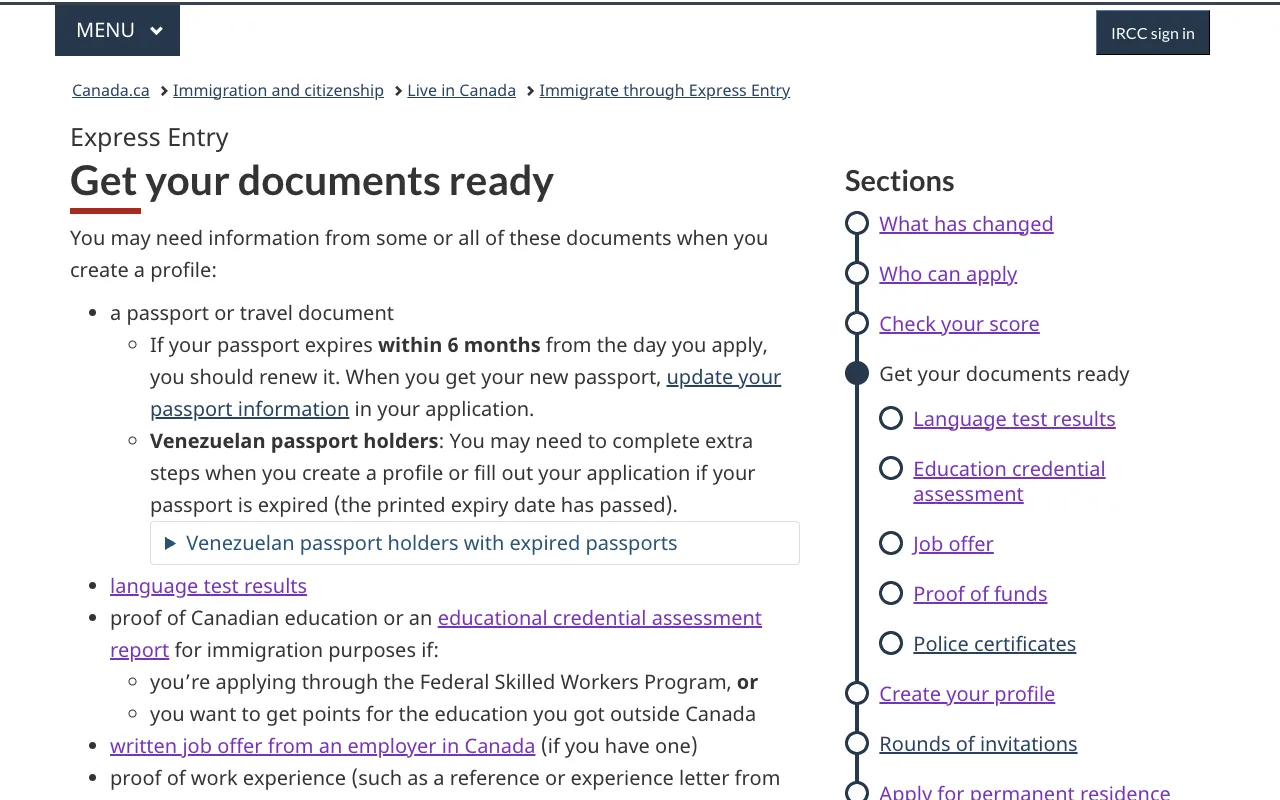
IRCC page · Immigrate through Express Entry: Documents · Whole page · Live page - IRCC's list for the profile stage covers your passport or travel document, language test results, your ECA (or proof of Canadian education), a written job offer (if you have one), proof of work experience, a certificate of qualification in a trade (if you have one), proof of funds, police certificates and a provincial nomination (if you have one).
- If your passport expires within 6 months, IRCC suggests renewing it and then updating your passport information.
- IRCC recommends listing work experience for the last 10 years. That keeps you eligible for the widest range of programs, and the permanent residence application asks for it anyway.
- Proof of funds is required for the Federal Skilled Worker and Federal Skilled Trades programs. You do not need it under the Canadian Experience Class, or if you are authorized to work in Canada and have a valid job offer. The required amount depends on family size and is updated every year (check IRCC's table).
- Police certificates can take a long time. IRCC suggests requesting them as soon as your profile is in the pool.
Check your eligibility and create your Express Entry profile
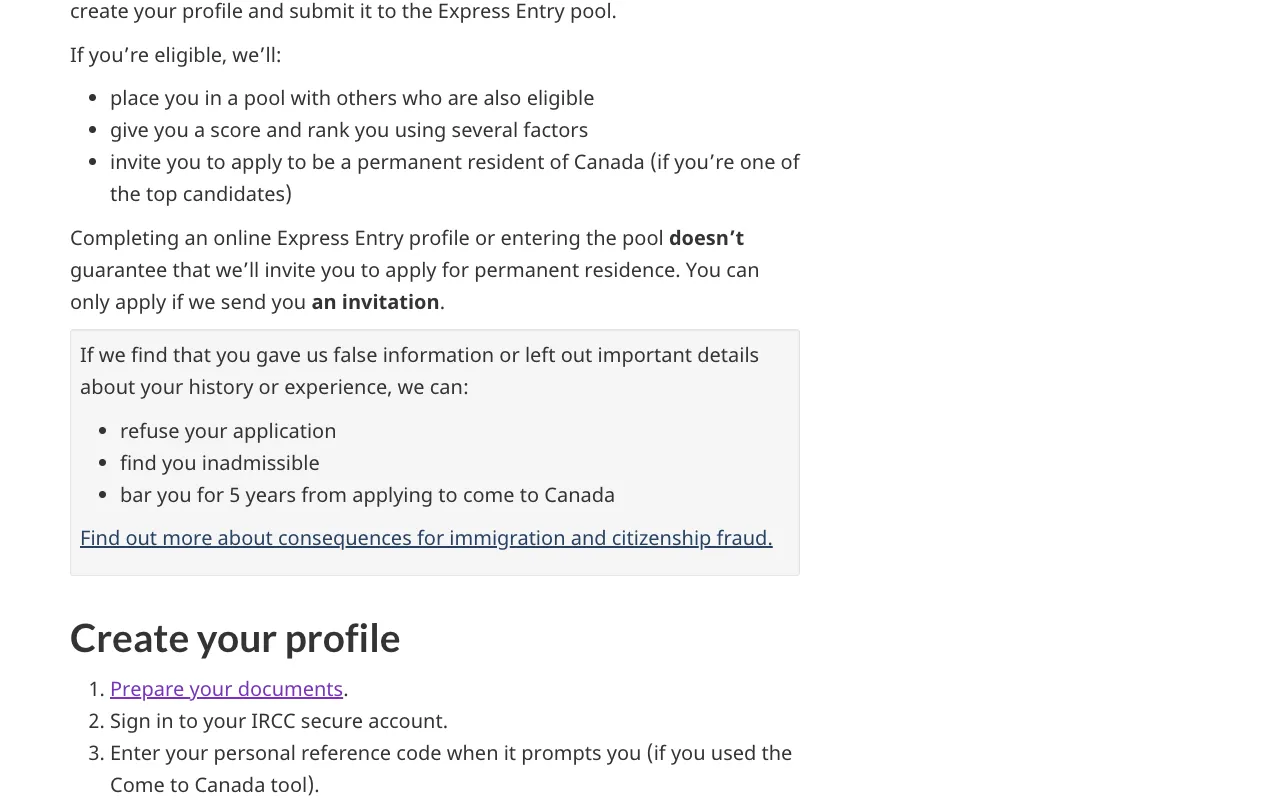
Answer IRCC's eligibility questions (in the Come to Canada tool or in your IRCC secure account), then complete and submit your profile in your IRCC secure account. A profile is not an application.
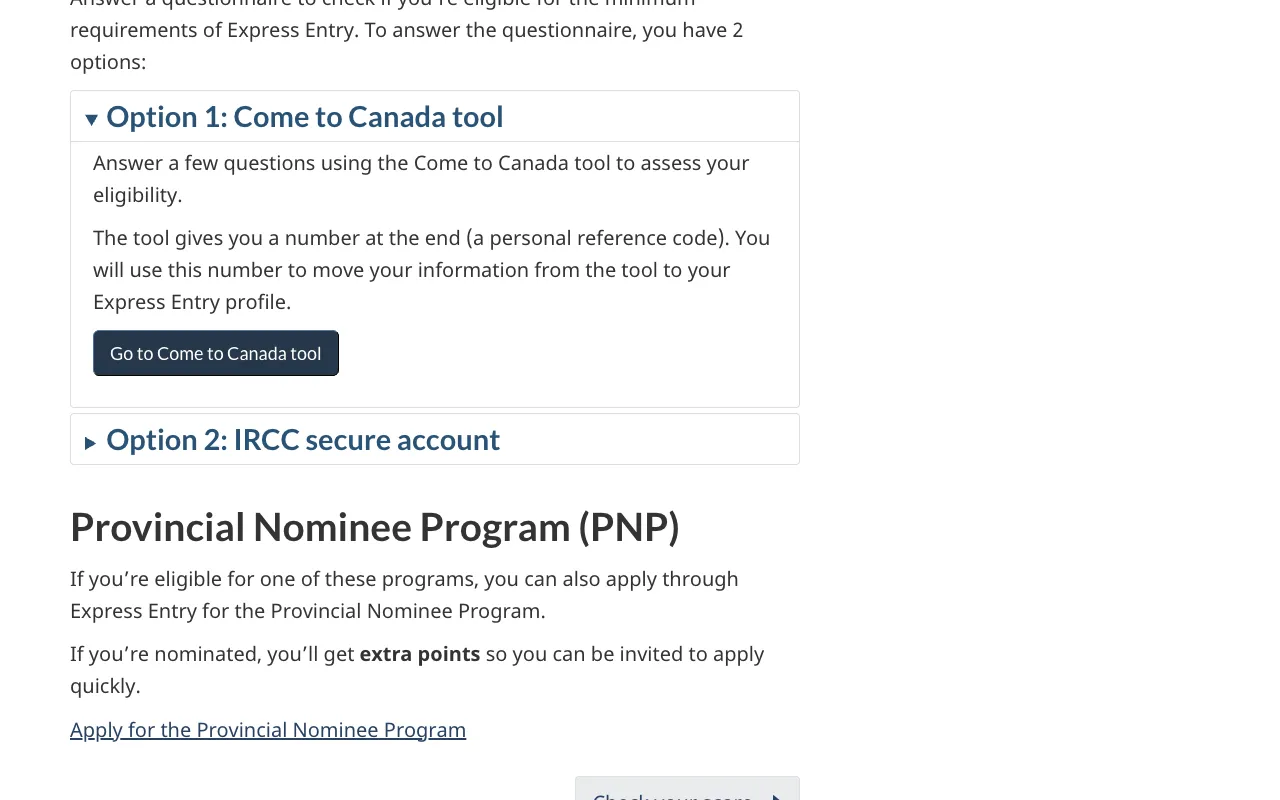
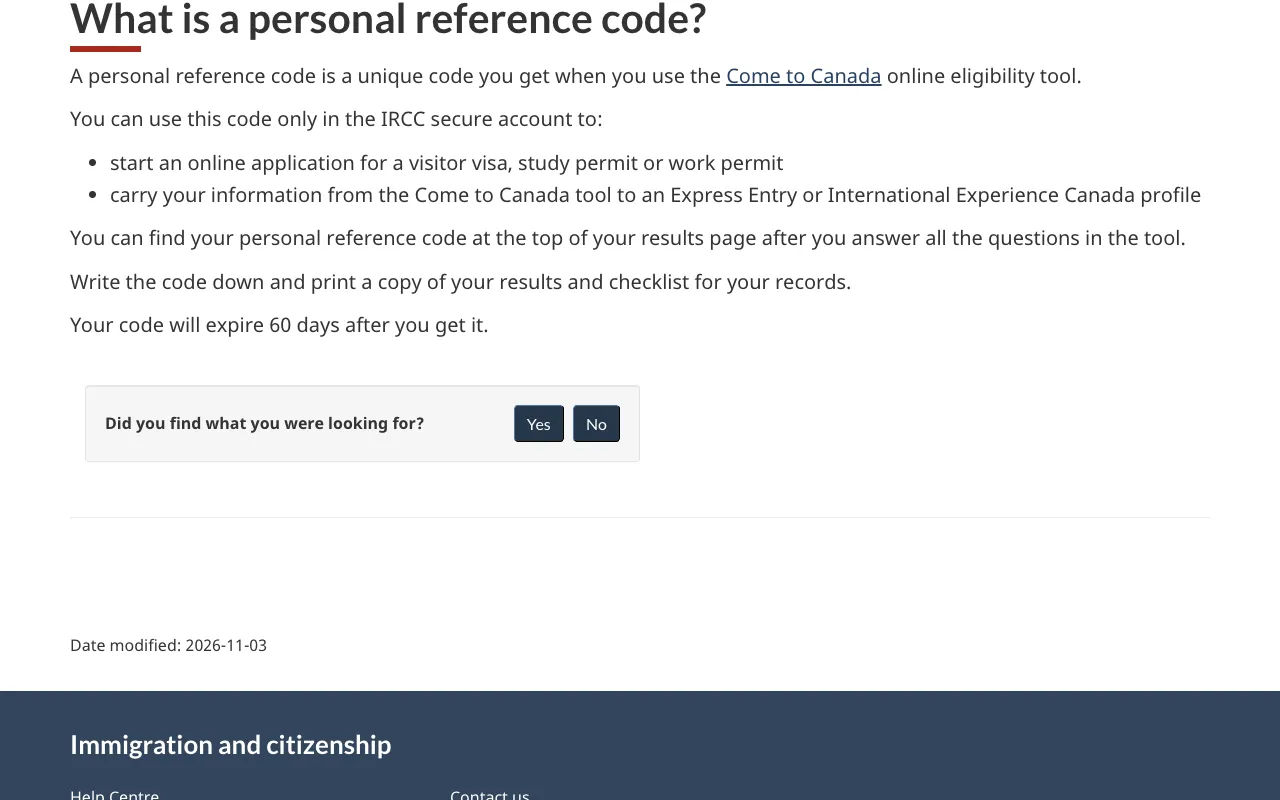
IRCC page · Express Entry: Who can apply · Whole page · Live page - Option 1: the Come to Canada tool gives you a personal reference code at the end. You enter it in your account to carry your answers into the profile. The code expires 60 days after you get it.
- Option 2: fill out the questionnaire directly in your IRCC secure account.
- You have 60 days to complete and submit the profile, or you must start again. You can save and exit at any time.
- The profile does not ask about dependent children. IRCC asks for that only if you are invited to apply.
- Before submitting, confirm every section on the “Express Entry profile” page shows a green check mark.
- Based on your answers, the system decides which program(s) you are eligible for. If you qualify for more than one, you are invited in a fixed order: Canadian Experience Class, then Federal Skilled Worker Program, then Federal Skilled Trades Program. You can't choose.
- Be accurate. IRCC warns that false information or leaving out important details can lead to refusal, inadmissibility and a 5-year bar.
Wait in the pool: your CRS score and rounds of invitations
Eligible profiles go into a pool and get a Comprehensive Ranking System (CRS) score. IRCC holds rounds of invitations and invites the highest-ranked eligible candidates. Being in the pool does not guarantee an invitation.
IRCC page · Express Entry: Create your profile and enter the pool · Whole page · Live page - The CRS gives points for core factors (age, education, official languages and, since November 3, 2026, a new Labour Market Integration factor for Canadian work experience or a qualifying high-wage job offer), spouse factors, skill transferability and additional points such as a provincial or territorial nomination.
- As of November 3, 2026, IRCC changed how points are awarded for Canadian work experience and job offers, and a Labour Market Impact Assessment (LMIA) is no longer needed for an Express Entry job offer. IRCC says it is recalculating existing profiles over up to two weeks and pausing rounds while it does.
- Rounds can be general, program-specific or category-based (for example, a specific language ability, occupation or education). Each round's instructions and the lowest score invited are published on IRCC's rounds page.
- Ties at the cut-off score are broken by the date and time the profile was submitted.
- Keep your profile up to date (new job or job offer, new language test, marriage or divorce, a new child). Watch for expiring language results or ECA and for work experience that ages out.
- A profile that is not invited within 12 months expires. You can then create a new one. Don't create a new profile while the old one is still active unless you withdraw it first.
- Use IRCC's CRS calculator for an estimate. If it differs from the Express Entry system, the system's result governs.
If you receive an invitation to apply (ITA): decide within 60 days
An invitation arrives as a message in your IRCC secure account and names the program you were invited under. You have 60 days to submit a complete application, so start right away, or decline if you no longer qualify.
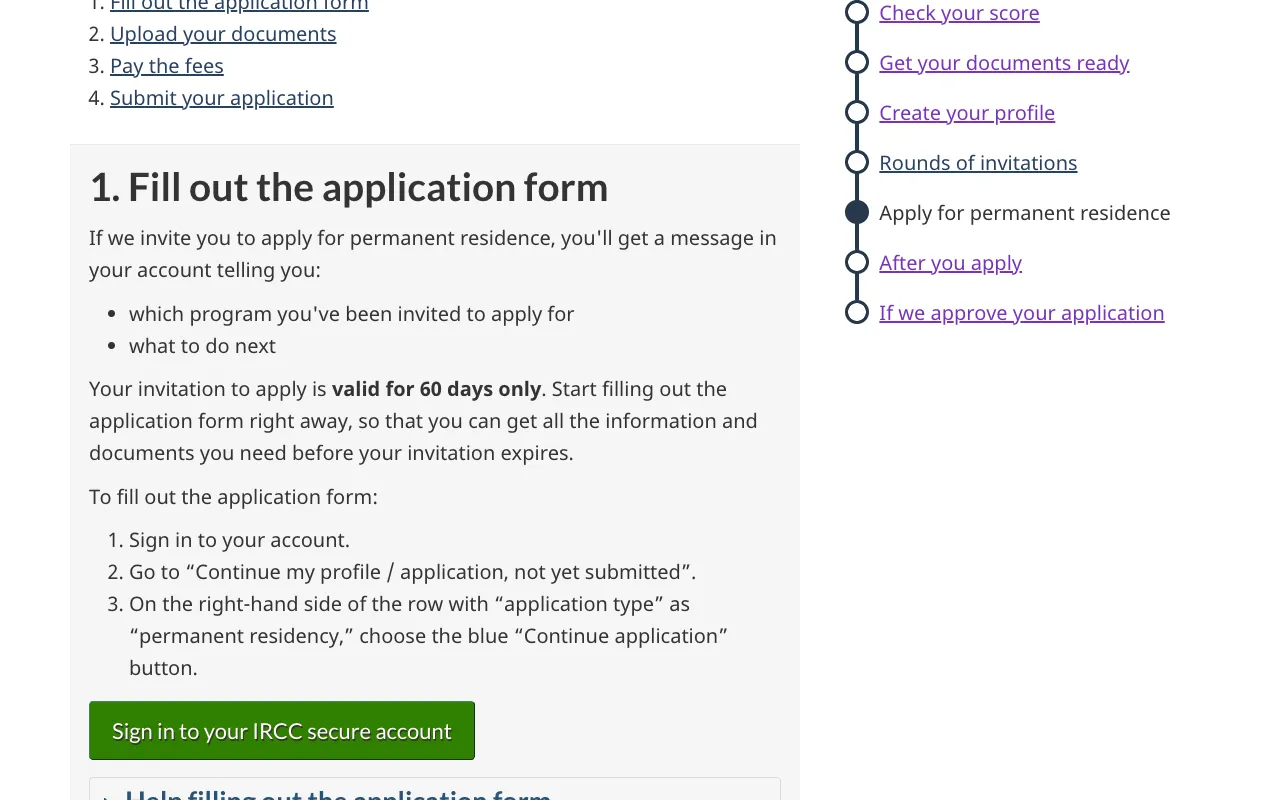
IRCC page · Apply for permanent residence through Express Entry · Whole page · Live page - The invitation is valid for 60 days only. If you neither apply nor decline in that time, it expires and your profile is removed from the pool.
- If your situation has changed since the round (for example, you lost a job offer or nomination, or your language results expired or dropped), recalculate your score. If it is now below the round's lowest score, IRCC says you should decline. If you apply anyway, IRCC may refuse your application and keep the fee.
- If your work permit expired and your score dropped below the cut-off, IRCC says to decline and then update your profile.
- Declining puts you back in the pool for future rounds if you are still eligible. It does not affect later invitations, but a new invitation is not guaranteed.
- Your profile information is copied into the application. You must check that it is still accurate and correct anything that changed before you submit.
Get an upfront immigration medical exam (IME)
For Express Entry, the medical exam is done after you are invited but before you apply. You, your spouse or partner and your dependent children all need one, even family members who are not coming with you.
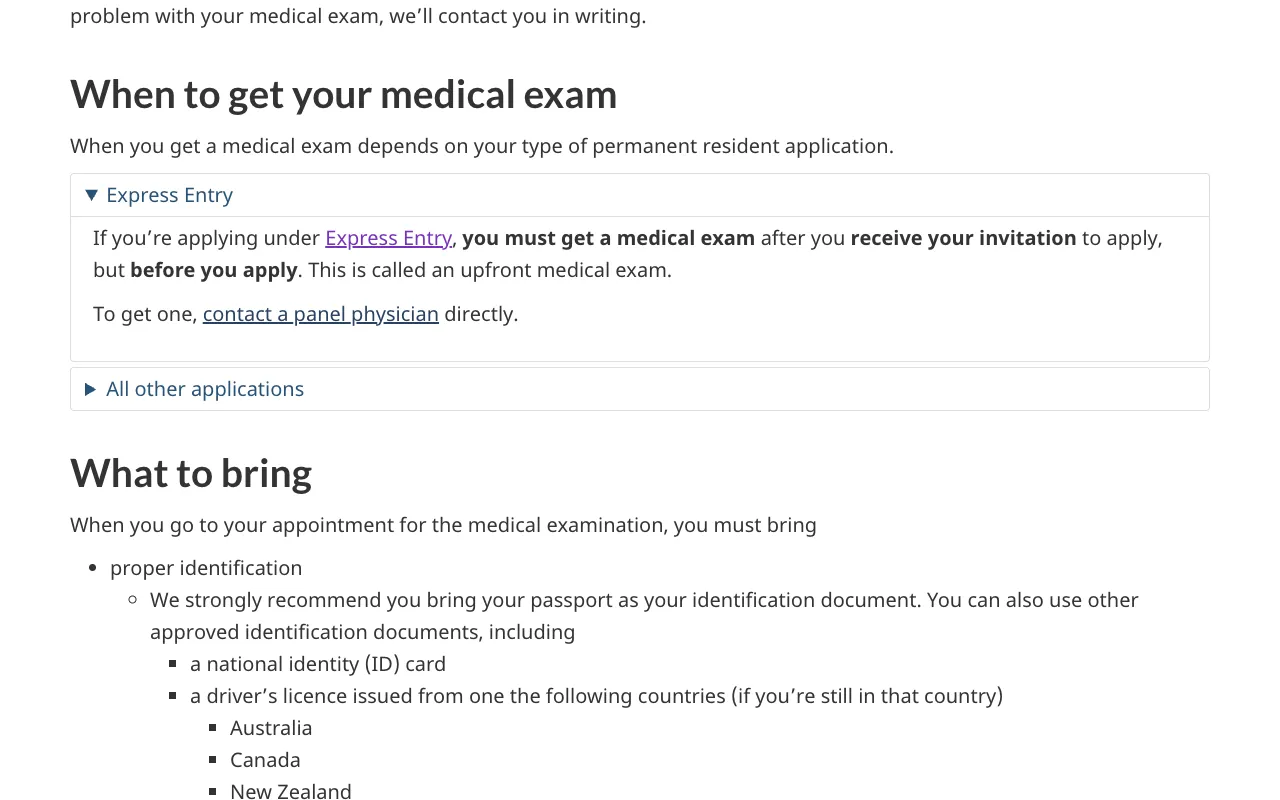
IRCC page · Medical examination for permanent residence applicants · Whole page · Live page - Contact a panel physician on IRCC's list directly. Your own doctor can't do the exam, and IRCC does not send you documents for it.
- The panel physician gives you an information printout sheet or an IMM 1017B Upfront Medical Report form. You will need one of these when you apply online.
- Don't book more than one IME appointment. Getting the exam close to the date you apply helps, because the results must still be valid when you become a permanent resident.
- If you live in Canada and did an IME in the last 5 years, a temporary public policy (extended to October 5, 2029) may exempt you. You give your previous IME number or unique medical identifier number instead.
- You pay the panel physician's fees and any tests directly, and these are not refunded if your application is refused.
Fill out the electronic application for permanent residence (e-APR)
The Express Entry application form is completed in your IRCC secure account, the same account as your profile. Your profile answers carry over, and the form adds questions such as your personal history and details about your family members.
IRCC page · Apply for permanent residence through Express Entry · Whole page · Live page - Sign in, go to “Continue my profile / application, not yet submitted”, and choose “Continue application” on the row whose application type is permanent residency.
- Re-check everything that came over from the profile. Your profile at the time of the round is compared with your application. Discrepancies that aren't explained by a real change in your situation can be examined as possible misrepresentation.
- The form asks whether you have applied to IRCC before. Only full applications count, not an Express Entry profile. It also asks whether you applied for Express Entry before. Answer “yes” only if you previously submitted a permanent residence application electronically.
- In the Personal history section, account for your activities (the Personal activities sub-section). For history entries you are still in, IRCC's general guidance is to use today's date or the signing date as the end date. If you don't know exact dates, use your best guess.
- You now declare dependent children and must include all family members (spouse or partner and dependent children), even those not coming with you.
- Your application locks when you submit it, so correct changes before then.
Upload your documents, pay the fees and submit
Once the form is complete, the system generates a personalized document checklist from your answers. You upload everything on it, pay the fees online and submit. The system won't let you submit an application with missing mandatory fields or documents.
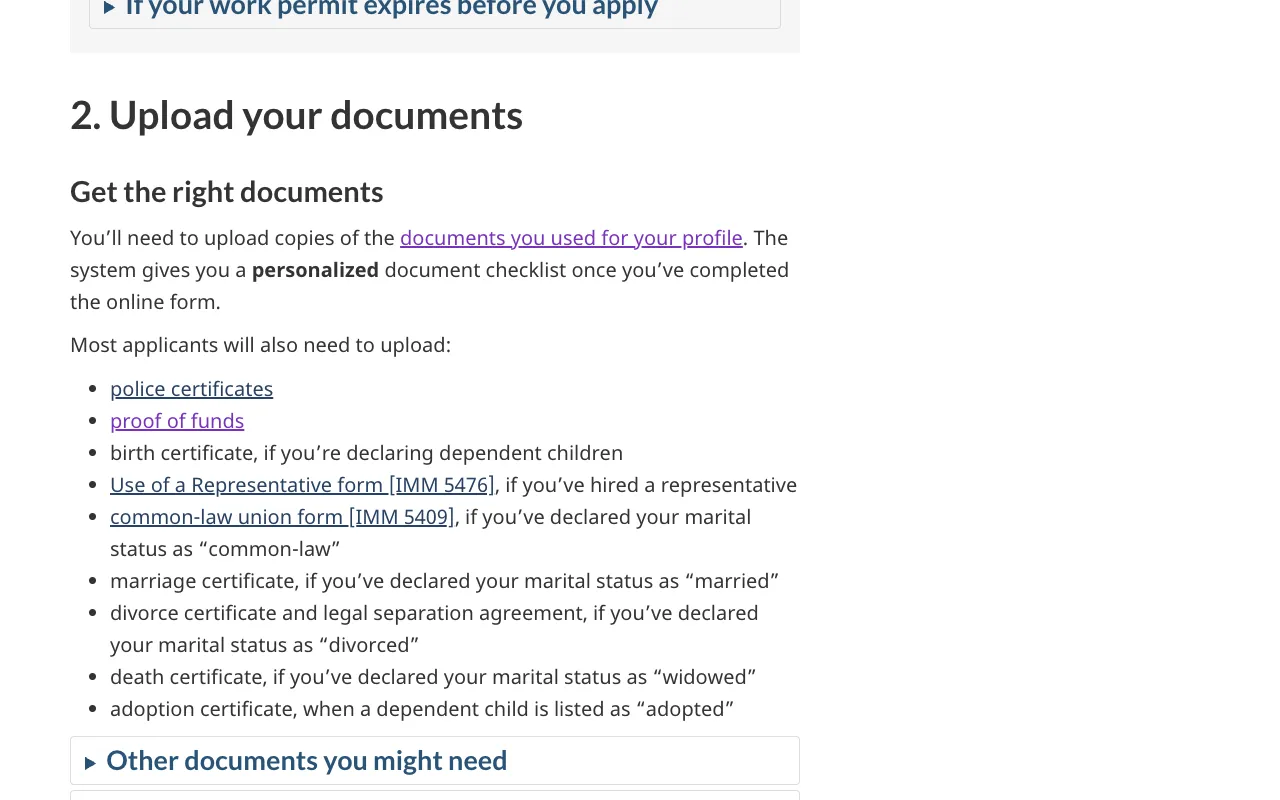
IRCC page · Apply for permanent residence through Express Entry · Whole page · Live page - You upload copies of the documents behind your profile claims, plus documents most applicants need: police certificates, proof of funds, proof of work experience, a medical exam confirmation and passport copies. Some documents depend on your situation, such as marriage, divorce, common-law, birth and adoption documents or a representative form. See the document checklist below.
- Police certificates must be colour scans of the originals. If one is not ready by the deadline, upload a letter of explanation and proof of your best efforts in that country's field. An officer decides whether that is enough.
- Documents not in English or French need a certified translation (or the translator's affidavit if a certified translator isn't possible) plus a scan of the original. Family members, representatives and consultants may not translate your documents.
- In the IRCC secure account, IRCC lists the accepted file types as .jpg, .png, .doc, .tiff and .pdf, with a per-file size limit of 4 MB. Use the letter of explanation option in the “Optional documents” section for anything that needs explaining.
- Fees listed by the system include the processing fee for you and each family member, the right of permanent residence fee and the biometrics fee, paid by debit or credit card. Check current amounts on IRCC's fee list, because fees change.
- At a minimum, the processing fee must be paid when you submit. IRCC recommends paying the right of permanent residence fee now too, and it must be paid before approval. If the application is incomplete, IRCC rejects it and refunds the fees. The processing fee is not refunded once processing starts.
- Submit before the 60-day deadline. Afterwards, you can upload only documents IRCC asks for through your account. Send other updates using IRCC's web form.
After you submit: biometrics, processing and updates
IRCC checks that your application is complete, asks you to give fingerprints and a photo (biometrics), and then assesses your eligibility and admissibility. All messages come through your IRCC secure account.
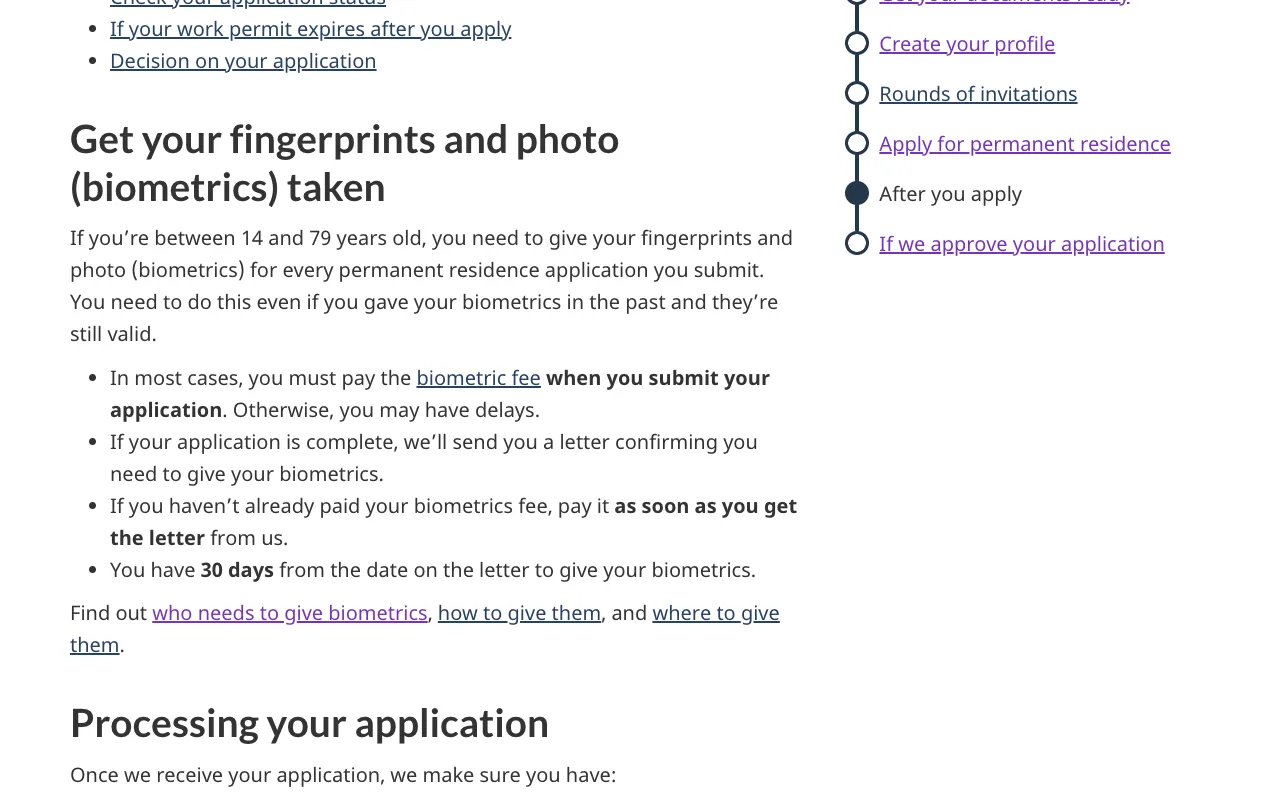
IRCC page · Express Entry: After you apply · Whole page · Live page - If you are 14 to 79 years old, you must give biometrics for every permanent residence application, even if you gave them before. Once your application is complete, IRCC sends a letter, and you have 30 days from its date to give them.
- IRCC uses your account to confirm the review, request biometrics, send status updates, ask for more documents and set up an interview if needed.
- Tell IRCC through its web form about changes such as a birth, adoption, marriage or divorce, a new address, a change in your job or job offer, a new credential or new language test results, or a withdrawn nomination.
- You can check status in your account. IRCC also offers an Application status tracker that may show more detail.
- If your work permit is about to expire, you may be eligible for a bridging open work permit while you wait.
- The decision considers program eligibility and admissibility, based on your medical exam, police certificates and background checks. IRCC's published processing time for Express Entry changes, so check its processing-times page.
If approved: get your COPR and become a permanent resident
If IRCC approves your application, you get a Confirmation of Permanent Residence (COPR), and a permanent resident visa if you need one. How you complete the final step depends on whether you are outside or inside Canada.
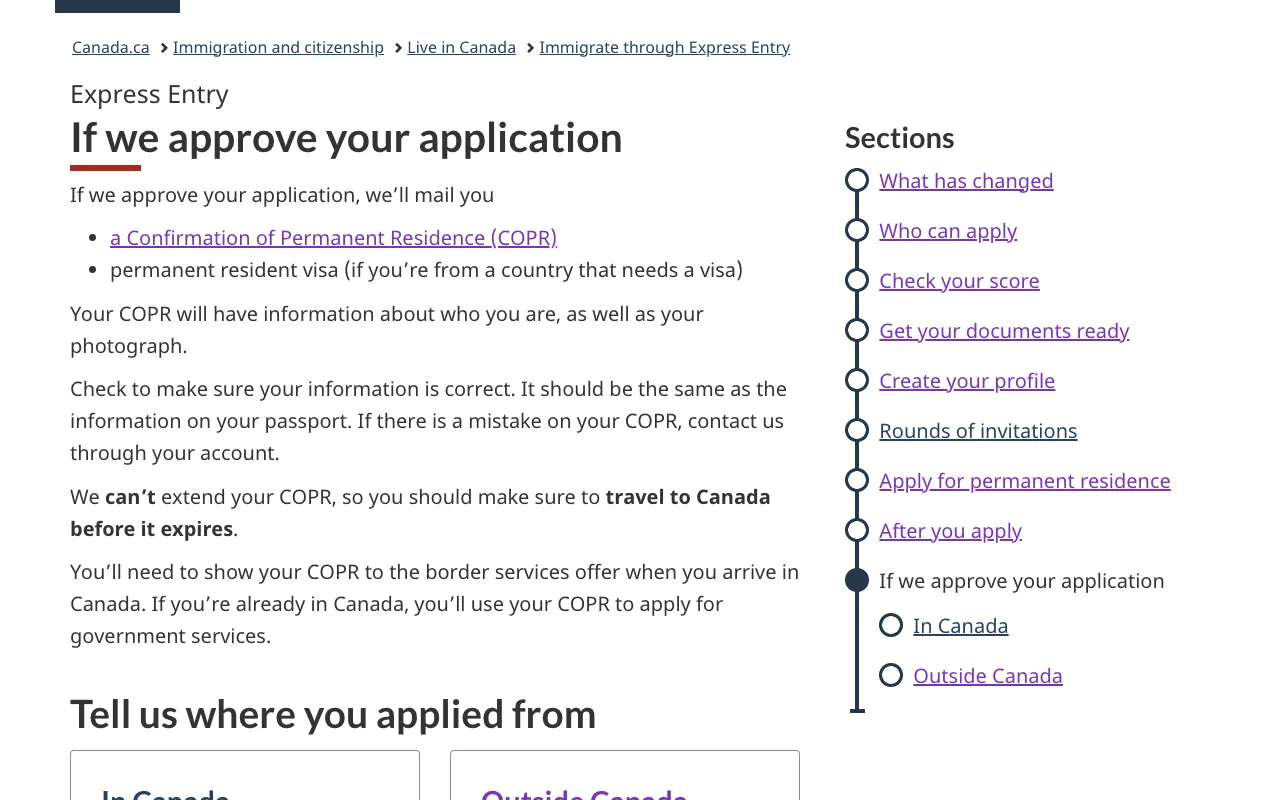
IRCC page · If your Express Entry application is approved · Whole page · Live page - Check that the details on your COPR match your passport. If something is wrong, contact IRCC through your account. The COPR can't be extended.
- Outside Canada: travel to Canada on or before the COPR's “Valid to” date. Bring your passport, COPR, permanent resident visa (if issued) and proof of funds (unless exempt). A Canada Border Services Agency officer will check your documents and ask a few questions.
- You must declare CAN$10,000 or more to the border officer when you arrive.
- Inside Canada: IRCC emails you (from an address ending in cic.gc.ca) and creates a Permanent Residence Portal account for you. Don't create your own. Confirm in the portal that you are in Canada, then receive your electronic COPR (e-COPR).
- The PR Portal is separate from your IRCC secure account. You also give your Canadian address there and upload a photo for your first PR card.
- Your first PR card is mailed to you, and you don't need to apply for it separately. Until it arrives, the COPR or e-COPR is your proof of status.
Documents checklist
Gather these before you apply. Your personalized checklist from IRCC is the final word on what your application needs.
- Language test resultsPrincipal applicant (required). A spouse or common-law partner's results are optional, for points.Only approved tests count (CELPIP-General, IELTS General Training, PTE Core, TEF Canada, TCF Canada). Results must be less than 2 years old when you complete the profile and when you submit the application. Enter the scores, and the certificate or test report form number and PIN if the system asks for them. Official source for Language test results
- Educational credential assessment (ECA) report for immigration purposes, plus proof of studiesPrincipal applicant (Federal Skilled Worker applicants with foreign education, or anyone claiming points for foreign education). Spouse or common-law partner if claiming points for their education.ECA must be from a designated organization and less than 5 years old at profile and application. The e-APR asks for the ECA reference number, and IRCC validates it online. A scan of the ECA isn't required at submission but may be requested. Proof of the credentials themselves (diplomas, degrees, transcripts) is also needed. For a Canadian credential, provide proof of completion and the Designated Learning Institution (DLI) number. Official source for Educational credential assessment (ECA) report for immigration purposes, plus proof of studies
- Copy of the biographical data page of a passport or travel documentPrincipal applicant, spouse or common-law partner, and accompanying dependent childrenMust be clear and legible. Renew a passport that expires within 6 months and update the details in your application. Some Venezuelan passport holders have special rules, so check IRCC's documents page. Official source for Copy of the biographical data page of a passport or travel document
- Medical examination confirmation (information printout sheet or IMM 1017B Upfront Medical Report form)Principal applicant, spouse or common-law partner, and dependent children, including family members who are not coming with youThis is an upfront exam done by a panel physician after the ITA and before you apply. The e-APR also asks for the unique medical identifier (UMI) or IME number. In-Canada applicants who did an IME in the last 5 years may be covered by a temporary public policy (until October 5, 2029). Official source for Medical examination confirmation (information printout sheet or IMM 1017B Upfront Medical Report form)
- Police certificatesPrincipal applicant, spouse or common-law partner, and dependent children 18 or older (including family members not coming with you)One for each country (except Canada) where the person spent 6 months or more in a row in the last 10 years, counting only time from age 18. The certificate for your current country must be issued no more than 6 months before you submit. Others must be issued after your last 6-month stay. Upload colour scans of the originals. Some countries require an IRCC request letter, and IRCC explains what to upload in that case. If a certificate is delayed, upload a letter of explanation and proof of your efforts. An officer can ask for more. Official source for Police certificates
- Proof of work experience (reference or experience letter from the employer)Principal applicant, for each work experience declared. Spouse or common-law partner if Canadian work experience is claimed for them.The checklist gives an upload field for each job declared. IRCC's instructions to officers describe the letter: official company letterhead, your name, the company's address, phone and email, and the name, title and signature of your supervisor or personnel officer. It should list every position held, with job title, duties, job status, dates, weekly hours and annual salary plus benefits. Self-employed applicants need business ownership and income evidence plus third-party documentation (self-declared duties or affidavits are not accepted). For Canadian work, T4 slips and notices of assessment can also be provided. Official source for Proof of work experience (reference or experience letter from the employer)
- Proof of fundsFederal Skilled Worker and Federal Skilled Trades applicants, unless authorized to work in Canada with a valid job offer. Not required under the Canadian Experience Class, but see notes.Official letter(s) on each financial institution's letterhead showing its contact details, your name, outstanding debts, and for each account the number, opening date, current balance and 6-month average balance. The funds must be legally available to you when you apply and when the visa is issued. Home equity and borrowed money don't count. Family size includes your spouse and dependent children even if they aren't coming. The system asks everyone for this document. If you're exempt, upload a letter explaining why. Required amounts are updated yearly, so check IRCC's table. Official source for Proof of funds
- Letter of offer from the employer (job offer)Principal applicant, only if claiming a qualifying job offerPrinted on company letterhead with your name, the company's contact details, and the name, title and signature of your proposed supervisor or personnel officer. It must state the start date, a commitment to continuous, paid, full-time work for at least 1 year after the permanent resident visa is issued, and the job title, duties, hours and annual salary plus benefits. Since November 3, 2026 no LMIA is needed, but an officer still assesses whether the offer is genuine. Official source for Letter of offer from the employer (job offer)
- Provincial or territorial certificate of qualificationPrincipal applicant (and spouse or common-law partner, if applicable), only if you declared oneA copy of the certificate is required. For the Federal Skilled Trades Program it can replace the job offer requirement. Official source for Provincial or territorial certificate of qualification
- Provincial nominationPrincipal applicant, if nominated by a province or territory through an Express Entry-linked streamListed by IRCC as a profile-stage document for provincial nominee candidates. Follow the province's and IRCC's PNP instructions. Official source for Provincial nomination
- Birth certificate (or equivalent document) for dependent childrenEach dependent child, including children not coming with youNeeded if you declare dependent children. Acceptable documents are a birth certificate, an equivalent document from the birth country, or a letter of explanation if no birth certificate is available. Official source for Birth certificate (or equivalent document) for dependent children
- Marriage certificatePrincipal applicant, if marital status is “married”The marriage must be valid where it took place and under Canadian law. Provide the certificate issued by the province, territory or country where it happened. Official source for Marriage certificate
- Statutory Declaration of Common-Law Union [IMM 5409] and evidence of cohabitationPrincipal applicant, if marital status is “common-law”Provide the IMM 5409 form plus proof of living together for at least 12 continuous months (for example joint bank statements, leases or utility bills). Official source for Statutory Declaration of Common-Law Union [IMM 5409] and evidence of cohabitation
- Divorce certificate and legal separation agreementPrincipal applicant and spouse or common-law partner, if marital status is “divorced”Provide the divorce order or certificate from the place of divorce. Include the separation agreement if available. Official source for Divorce certificate and legal separation agreement
- Death certificatePrincipal applicant, if marital status is “widowed”Provide a death certificate or other legal certificate issued where the death occurred. Official source for Death certificate
- Adoption certificateEach dependent child listed as “adopted”, including children not coming with youProvide the adoption certificate or legal adoption papers from the place that formalized the adoption. Official source for Adoption certificate
- Use of a Representative form [IMM 5476]Principal applicant (and spouse or partner, if applicable), if you appoint a representative. Accompanying dependent children 18 or older sign their own if the representative acts for them.Use the current version of the form from IRCC's page. You remain responsible for everything in your application even if a representative fills it out. Official source for Use of a Representative form [IMM 5476]
- Proof of relationship to a relative in CanadaPrincipal applicant or spouse or common-law partner, only if requested on your checklist (for example, a claimed brother or sister in Canada)Provide the relative's Canadian citizenship or PR document, recent proof that they live in Canada (dated within six months), and proof of the family relationship. Official source for Proof of relationship to a relative in Canada
- Digital photosPrincipal applicant, spouse or common-law partner, and dependent children, if on your checklistMust meet IRCC's permanent resident card photo specifications. Official source for Digital photos
- Other name (aliases)Anyone in the application who has used another name (for example a maiden name), if on your checklistExplain or document the other name, for example with a letter of explanation or legal name-change documents. Official source for Other name (aliases)
- Authority to release personal information to a designated individual form [IMM 5475]Optional. Principal applicant (and spouse or partner, or adult dependent children, for their own information) if you want someone to receive information about your file.The system does not ask for this form, so upload it in the open field for other documents. Official source for Authority to release personal information to a designated individual form [IMM 5475]
- Proof that you don't plan to settle in Quebec (if counting work experience from Quebec)Applicants counting work experience gained in QuebecExpress Entry programs require you to plan to live outside Quebec. If you count Quebec work experience, include proof of your plans. Official source for Proof that you don't plan to settle in Quebec (if counting work experience from Quebec)
- Translations of documents not in English or FrenchAnyone submitting a document in another languageUpload an English or French translation stamped by a certified translator, or one accompanied by the translator's affidavit if a certified translator isn't possible. Also upload a scan of the original (or of the certified photocopy the translator used). Translate stamps and seals too. You and your family members can't certify copies. Official source for Translations of documents not in English or French
- Letter of explanation (optional documents)Any applicant who needs to explain a situationUsed, for example, to explain why proof of funds isn't needed, to prove implied status while a new work permit application is pending, or to explain a delayed police certificate. Several documents in one optional field must be combined into a single file. Official source for Letter of explanation (optional documents)
- Photo for your first PR card (PR Portal, in-Canada applicants)Each person confirming permanent residence from within CanadaUploaded in the Permanent Residence Portal after approval. IRCC sets detailed requirements: taken by a professional photographer in the last 12 months, plain white background, JPEG or PNG, between 715 × 1000 and 2000 × 2800 pixels, no larger than 4MB, and not altered. Official source for Photo for your first PR card (PR Portal, in-Canada applicants)
- Documents to carry when you land (outside-Canada applicants)Each person travelling to Canada to become a permanent residentA valid regular passport (not a diplomatic, government service or public affairs passport), your COPR and permanent resident visa if issued, and proof of funds unless you're exempt. Keep them with you, not in your luggage. Official source for Documents to carry when you land (outside-Canada applicants)
What to write where
Field by field, in the order the form asks, with each one outlined on the form. Labels are as IRCC prints or documents them; the examples are made up.
Express Entry profile (IRCC secure account)
Come to Canada tool
IRCC's optional eligibility questionnaire. It checks the minimum Express Entry requirements and gives a code you enter in your account so your answers carry into the profile. Instead, you can answer the same questionnaire inside your IRCC secure account (choose “Express Entry” under I do not have a Personal Reference Code). Official source for Come to Canada tool
 1
 2
- 1 personal reference code
What they’re asking: The code shown at the top of your Come to Canada results page.
Enter the code shown at the top of the Come to Canada results page when your account asks for it. It expires 60 days after you get it. It won't work if you had already started a profile in your account. In that case, continue the existing profile.
Watch out: Using a code after starting a profile directly in the account. IRCC says the code won't work then.
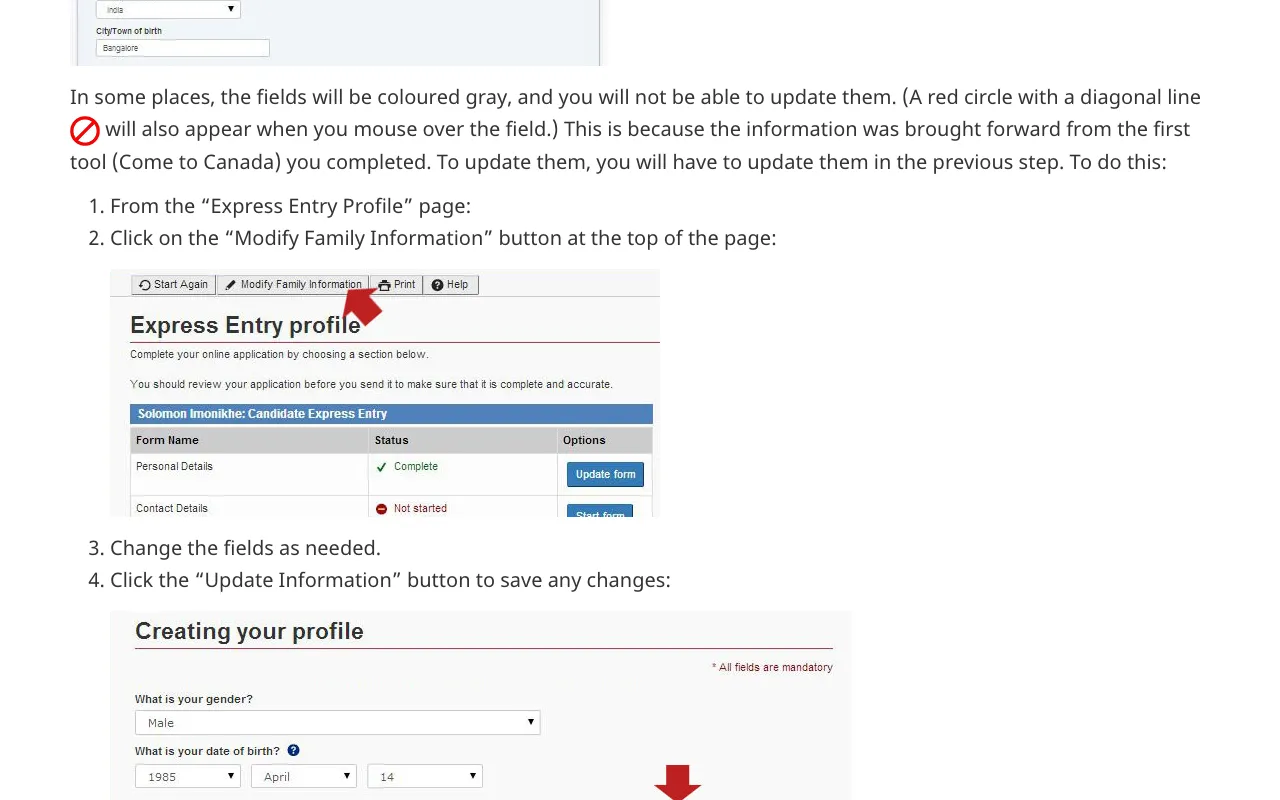
- 2 Modify Family Information
What they’re asking: A button to change greyed-out answers carried over from the eligibility questions.
A button at the top of the “Express Entry Profile” page. Some fields carried over from the eligibility questions appear greyed out. Use this button to change them, then click “Update Information”.
Express Entry profile
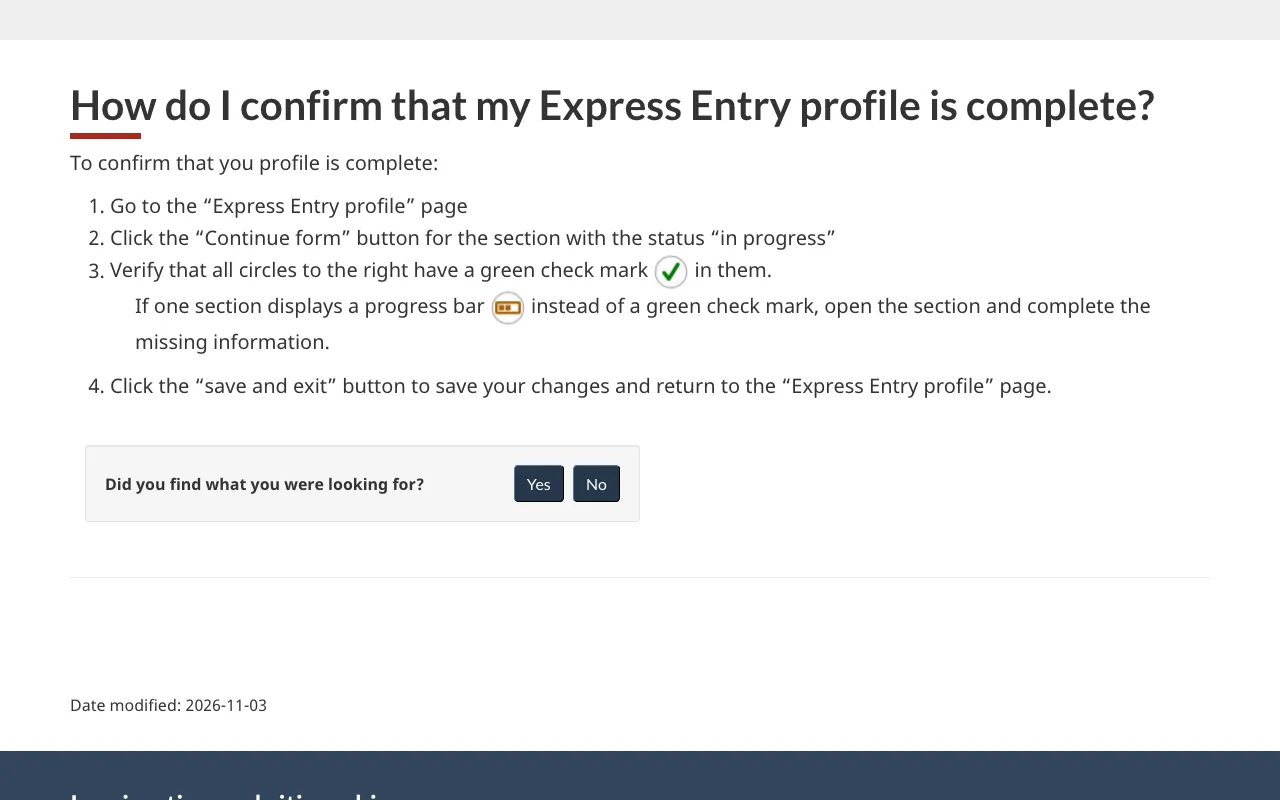
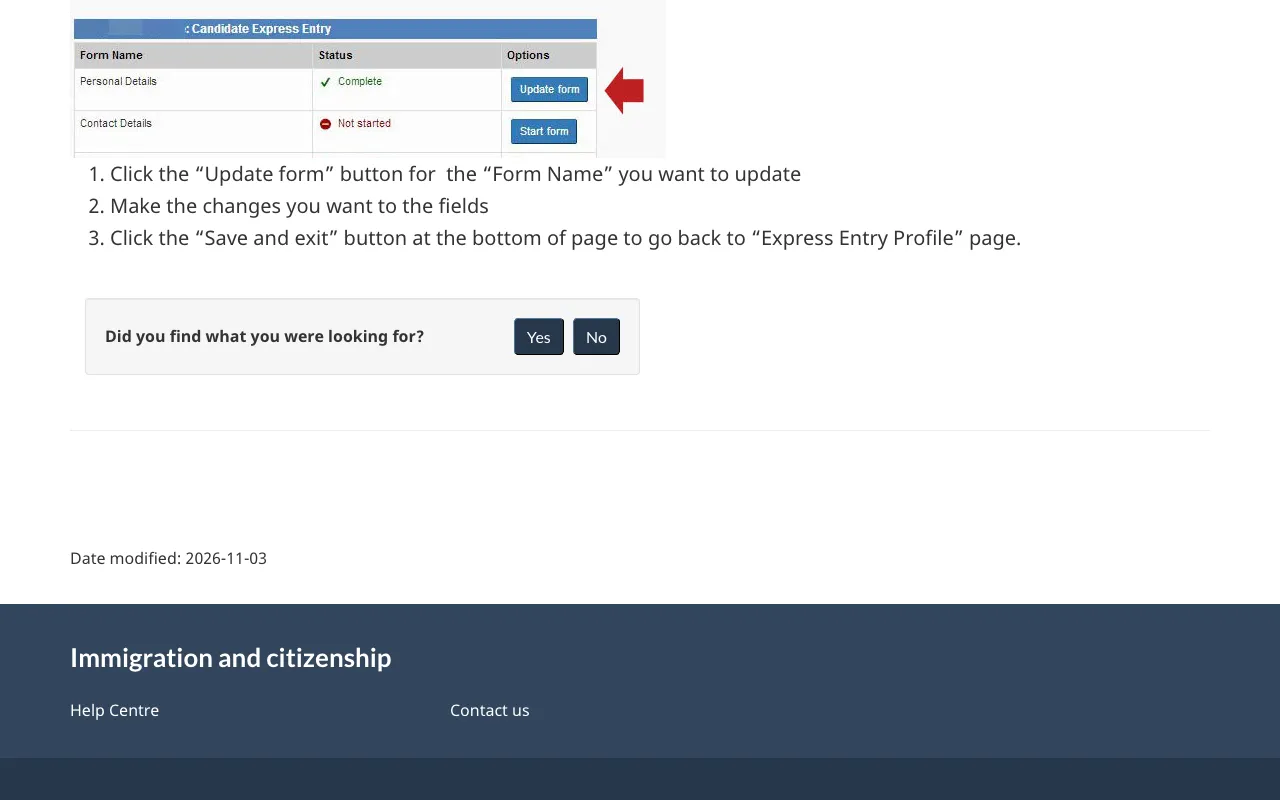
The main profile page lists each form of the profile with its status. Across these forms the profile asks about your skills, work experience, language ability, education, passport, family (spouse or partner, marital status), funds, any job offer or nomination, and where you plan to live in Canada. It does not ask about dependent children, which comes only after an invitation. Official source for Express Entry profile
 1
 2
 3
 4
- 1 Continue form
What they’re asking: A button that opens any profile section still marked in progress.
Button that opens a form section that is still “in progress”. A section is complete when its circle shows a green check mark.
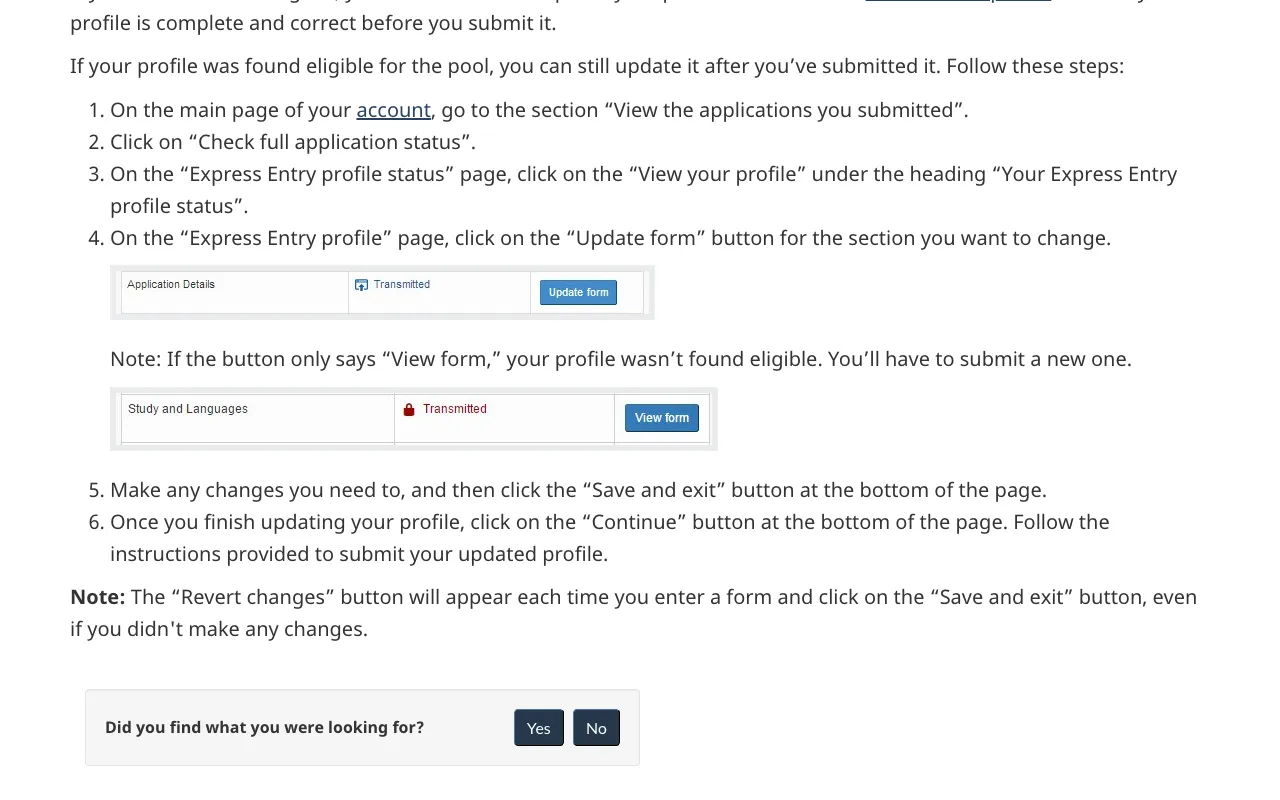
- 2 Update form
What they’re asking: A button to change a section, before submitting or after you're found eligible.
Button to edit a form section before you submit, or after your profile has been found eligible. If only “View form” appears, the profile wasn't found eligible and you must create a new one.
- 3 Save and exit
What they’re asking: Saves this section so you can leave and come back later.
Saves the section and returns you to the “Express Entry profile” page. You can leave and come back, but you must submit within 60 days.
- 4 Check for Completeness
What they’re asking: A button that shows which answers are still missing.
Button at the top of a form that flags missing answers in red so you can fix them before moving on.
Study and languages
Where you enter your language test results (and the certificate or test report form number and PIN if asked) and your education. For each credential, enter your ECA results and reference number, or for Canadian credentials, the Designated Learning Institution (DLI) number. Official source for Study and languages
 1
 2
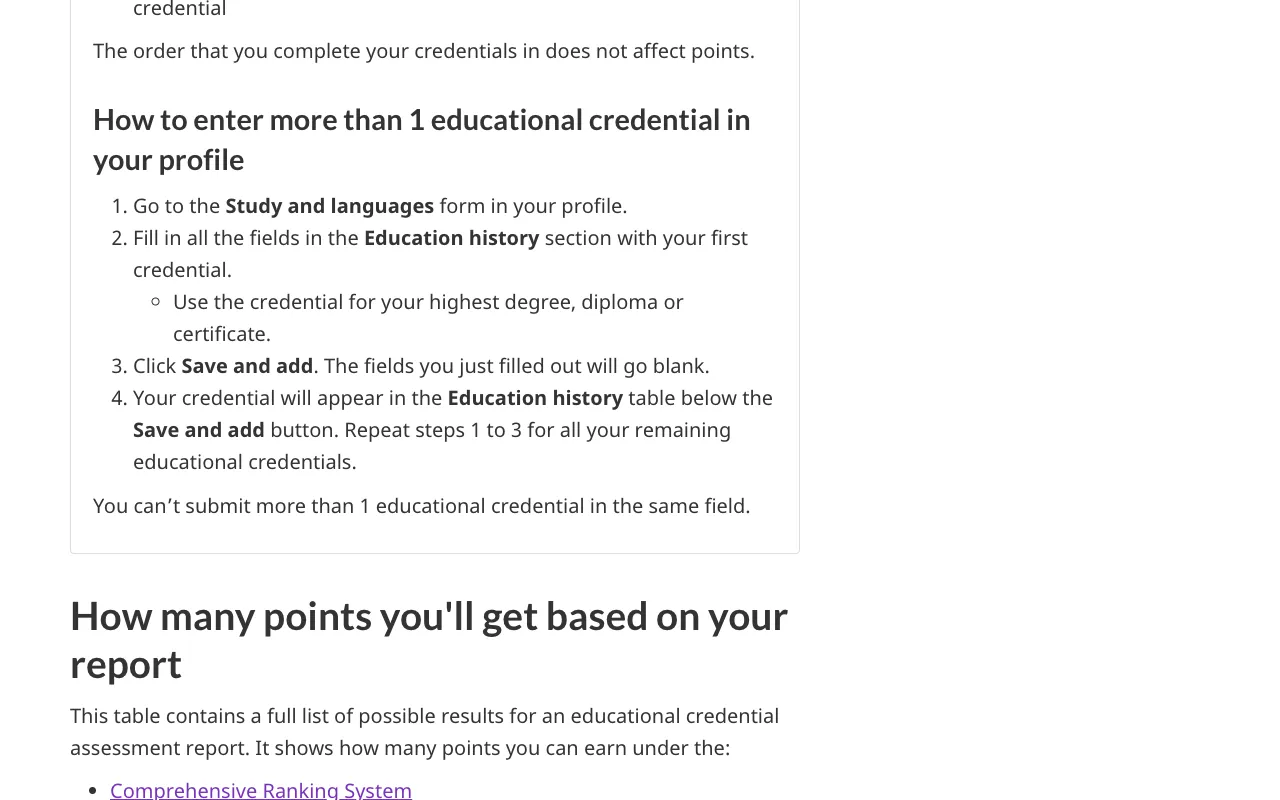
- 1 Education history
What they’re asking: Your degrees, diplomas or certificates, one per entry, starting with the highest.
Fill in all fields for one credential, starting with your highest degree, diploma or certificate, then click “Save and add”. Repeat for each credential you want assessed for points. Each credential gets its own row.
Watch out: Putting more than one credential in the same entry. IRCC says you can't submit more than 1 educational credential in the same field.
- 2 Save and add
What they’re asking: Saves this credential and clears the fields for the next one.
Saves the credential you entered to the Education history table and clears the fields so you can add the next one.
Work history
Your jobs, with their NOC codes, dates, hours and employer contact details, plus any job offer in Canada (start date, employer name and address, NOC). IRCC recommends listing the last 10 years of work. Because the online system had not yet been updated for the November 3, 2026 rule change, IRCC gives temporary instructions for entering a job offer that has no LMIA. Official source for Work history
 1
 2
 3
 4567
 89
 10
- 1 Work experience in Canada
What they’re asking: Your jobs in Canada, each with the occupation code (NOC) matching what you do.
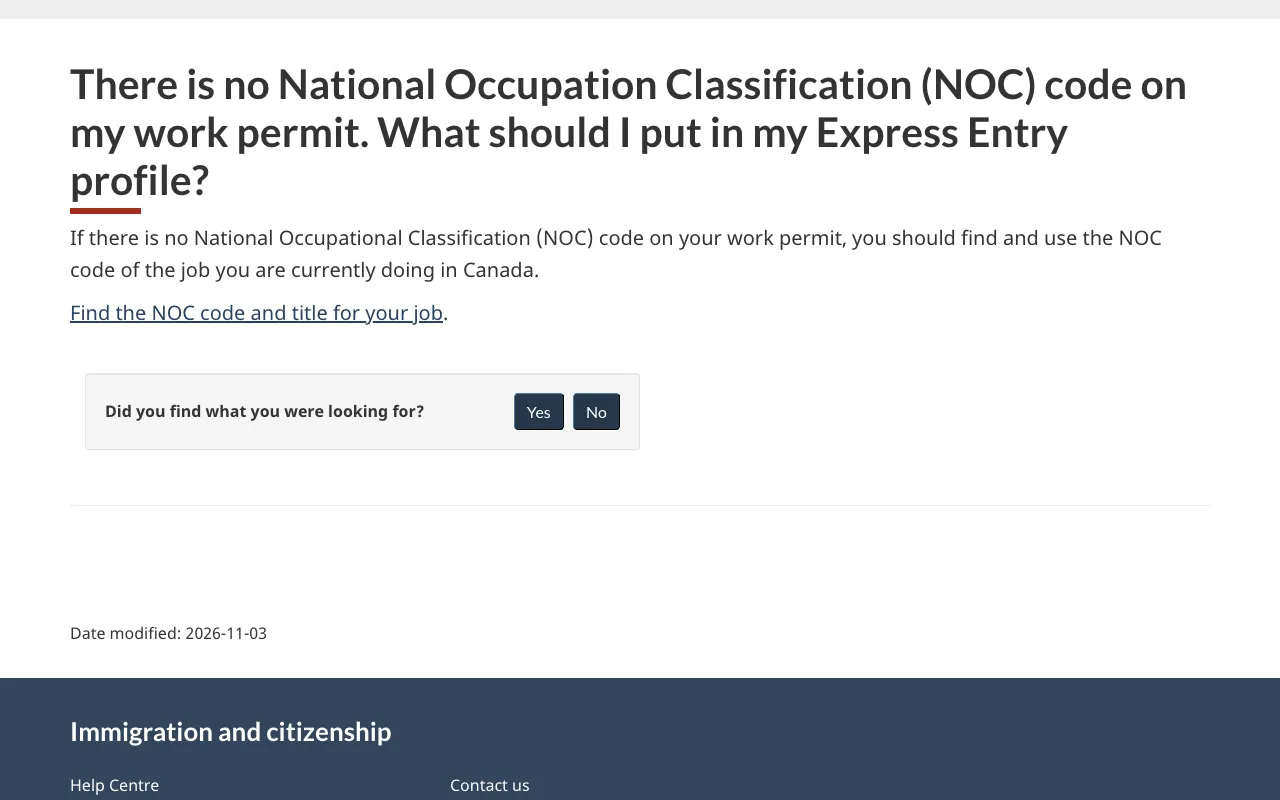
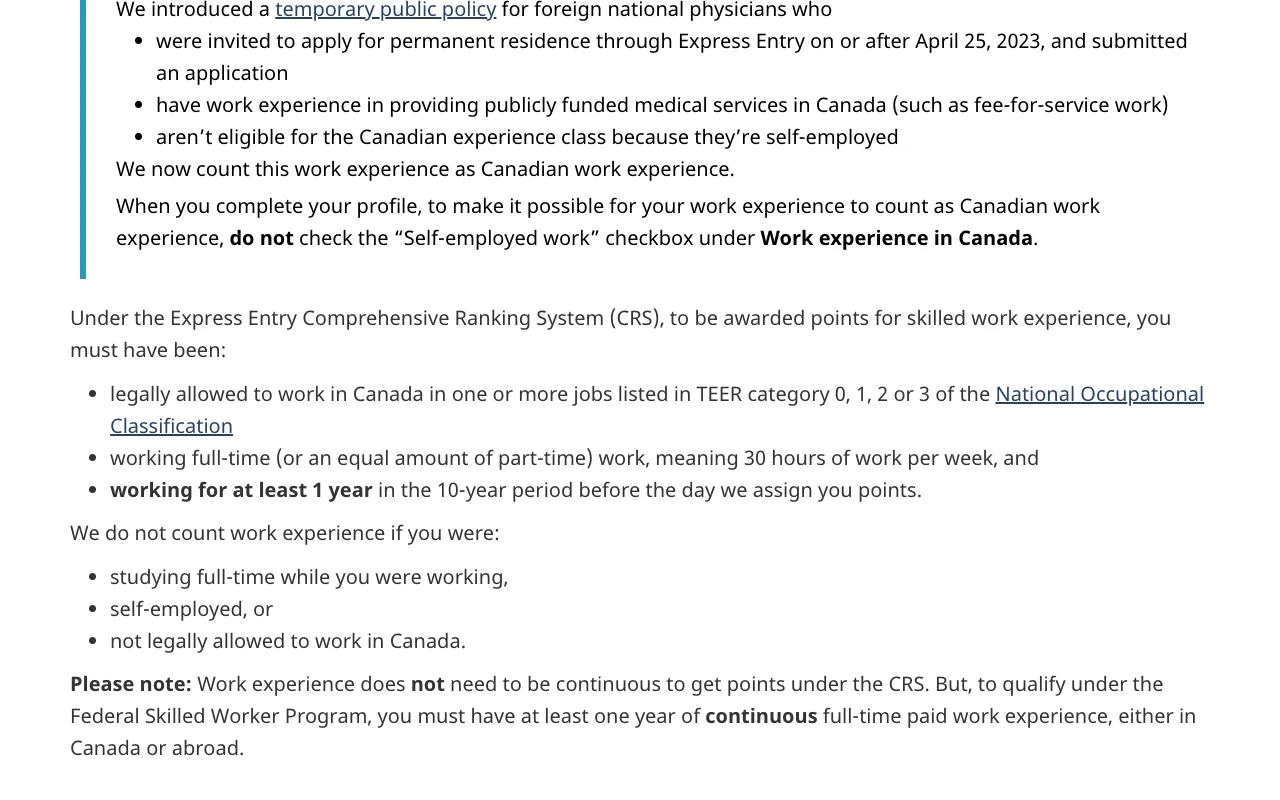
Where you list Canadian jobs. Use the NOC code of the job you actually do. If your work permit has no NOC code, look it up yourself. Some physicians with publicly funded fee-for-service work must leave the “Self-employed work” checkbox unchecked so the time counts.
Watch out: Counting work that doesn't qualify. IRCC does not count work done while studying full-time, self-employment (except some physicians) or work without authorization.
- 2 Self-employed work
What they’re asking: A checkbox for marking Canadian work as self-employed.
Checkbox under Work experience in Canada. Self-employed time generally doesn't count as Canadian work experience. IRCC tells eligible physicians covered by its temporary public policy not to check it.
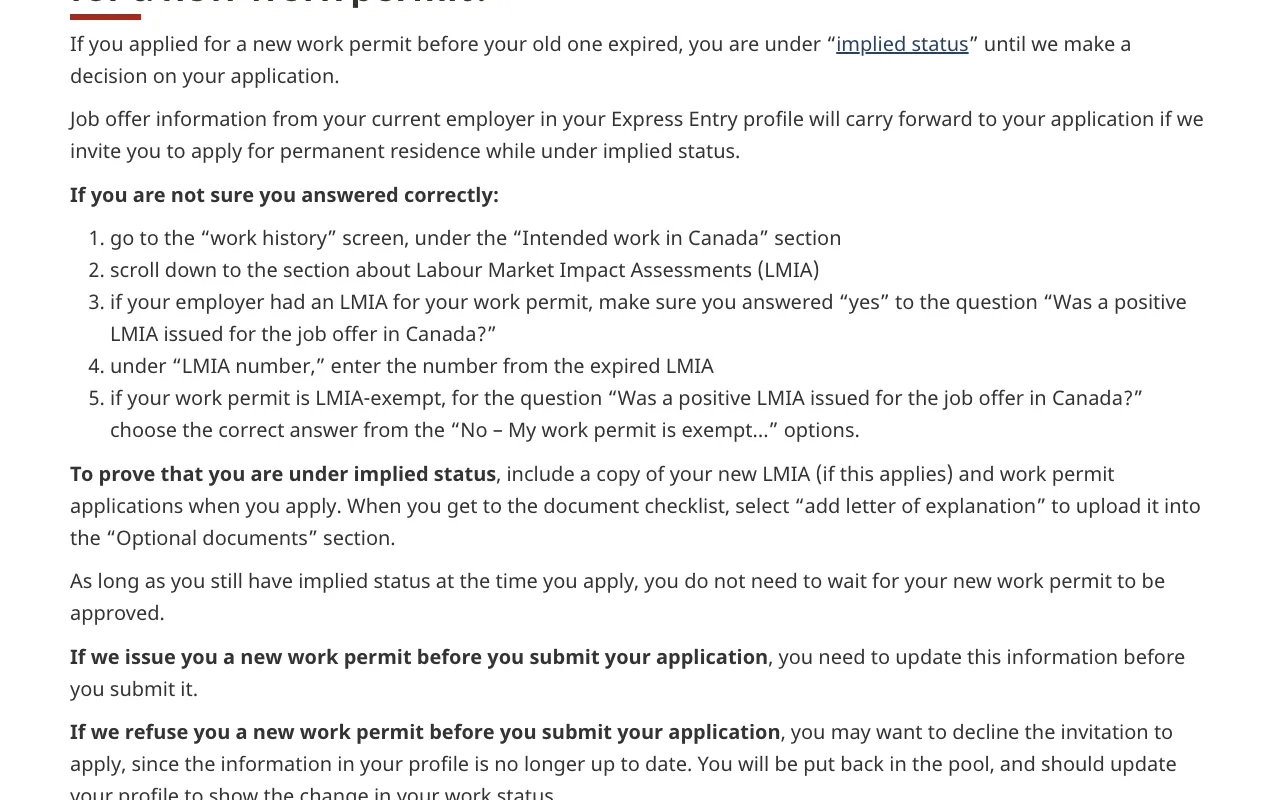
- 3 Intended work in Canada
What they’re asking: The part of your work history screen with job offer questions.
Section of the work history screen where job offer and LMIA questions appear.
- 4 Was a positive LMIA issued for the job offer in Canada?
What they’re asking: Does your job offer in Canada have a positive LMIA (Labour Market Impact Assessment)?
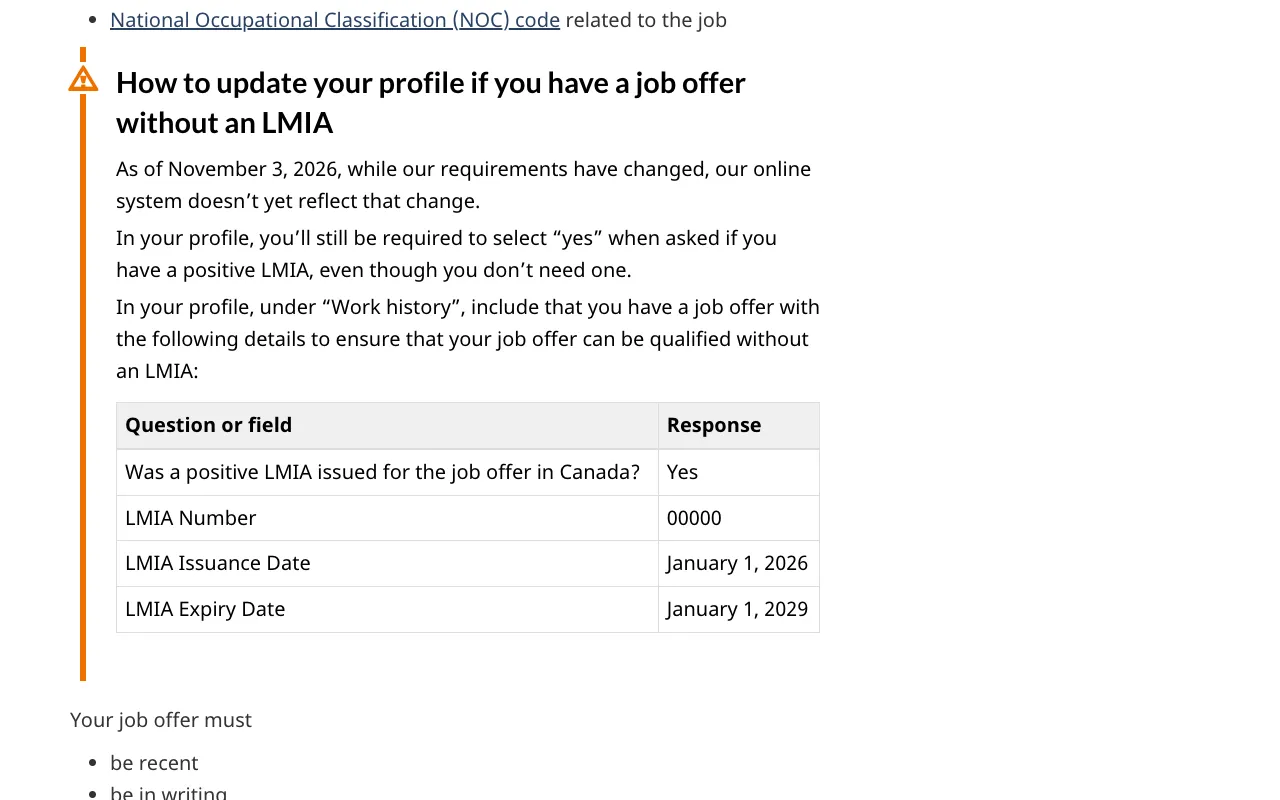
As of November 3, 2026 an LMIA is not required, but the system still asks. IRCC's temporary instruction is to answer “Yes” for a qualifying job offer without an LMIA and use the placeholder values in the next fields. Check IRCC's job offer page for the current instruction before you answer, as this will change when the system is updated.
Watch out: Leaving out a valid job offer because you don't have an LMIA. IRCC says to update your profile with it.
Official source for the field “Was a positive LMIA issued for the job offer in Canada?”
- 5 LMIA Number
What they’re asking: The LMIA number, or IRCC's placeholder if your job offer has none.
For a job offer without an LMIA, IRCC's temporary instruction (as of November 3, 2026) is to enter 00000.
- 6 LMIA Issuance Date
What they’re asking: The date the LMIA was issued, or IRCC's placeholder date if none.
For a job offer without an LMIA, IRCC's temporary instruction is to enter January 1, 2026.
- 7 LMIA Expiry Date
What they’re asking: The date the LMIA expires, or IRCC's placeholder date if none.
For a job offer without an LMIA, IRCC's temporary instruction is to enter January 1, 2029.
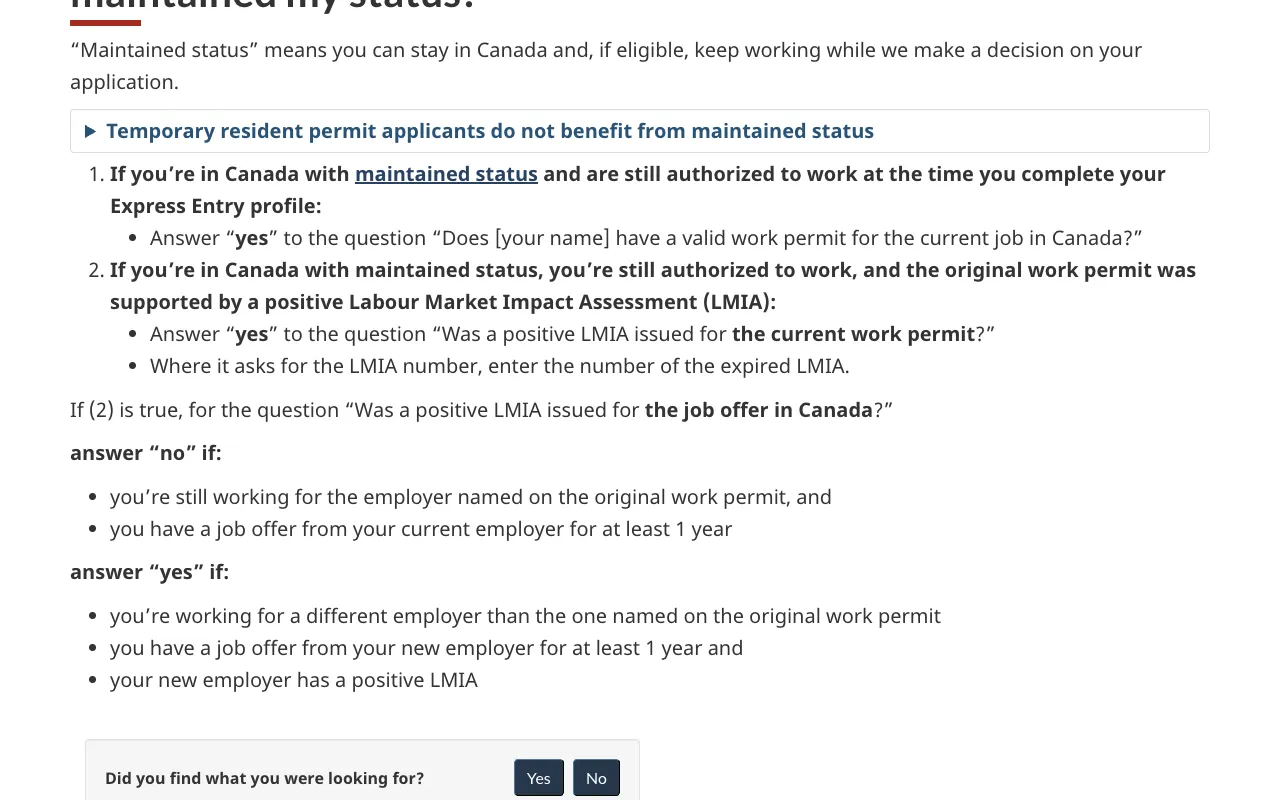
- 8 Does [your name] have a valid work permit for the current job in Canada?
What they’re asking: Are you currently authorized to work in your Canadian job?
Answer based on your current authorization to work. IRCC's help centre explains that people on maintained status who are still authorized to work answer “yes”.
- 9 Was a positive LMIA issued for the current work permit?
What they’re asking: Whether an LMIA was behind your current or original work permit.
About the LMIA behind your current or original work permit, if there was one. IRCC's help centre covers how people on maintained status answer it.
Official source for the field “Was a positive LMIA issued for the current work permit?”
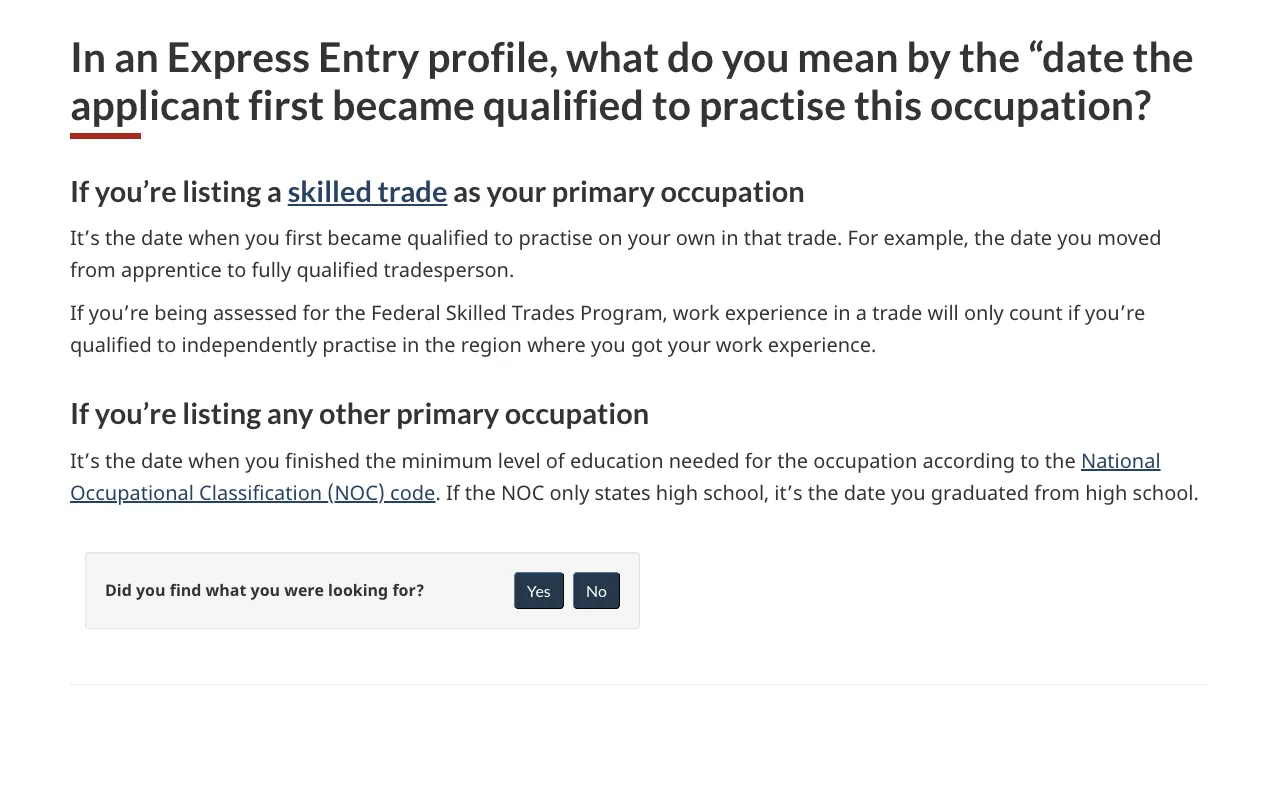
- 10 date the applicant first became qualified to practise this occupation
What they’re asking: The date you first became qualified to work in this occupation.
For a skilled trade, the date you became fully qualified to work on your own, for example when you moved from apprentice to qualified tradesperson. For other occupations, the date you finished the minimum education the NOC requires.
Electronic application for permanent residence (e-APR) in the IRCC secure account
Fill out the application form
After an invitation, the application is opened from your account. Profile information transfers in automatically. The form adds questions, including whether you have applied to IRCC before (full applications only) and whether you have applied for Express Entry before (only a previously submitted electronic PR application counts), plus details on dependent children and all family members. Official source for Fill out the application form
12- 1 Continue my profile / application, not yet submitted
What they’re asking: Where your permanent residence application appears in your account after an invitation.
Section on your account's main page where the permanent residence application appears after an invitation. IRCC's help centre also describes accepting the invitation from a table headed “Continue an application you haven’t submitted” with a “Start application” button, so the wording on screen may vary.
Official source for the field “Continue my profile / application, not yet submitted”
- 2 Continue application
What they’re asking: The button that opens your permanent residence application.
The blue button on the row whose application type is “permanent residency”.
Personal history
Where you account for your activities over time. IRCC uses the personal history, travel history and address history you give to decide which police certificates the document checklist asks for. Official source for Personal history
 1
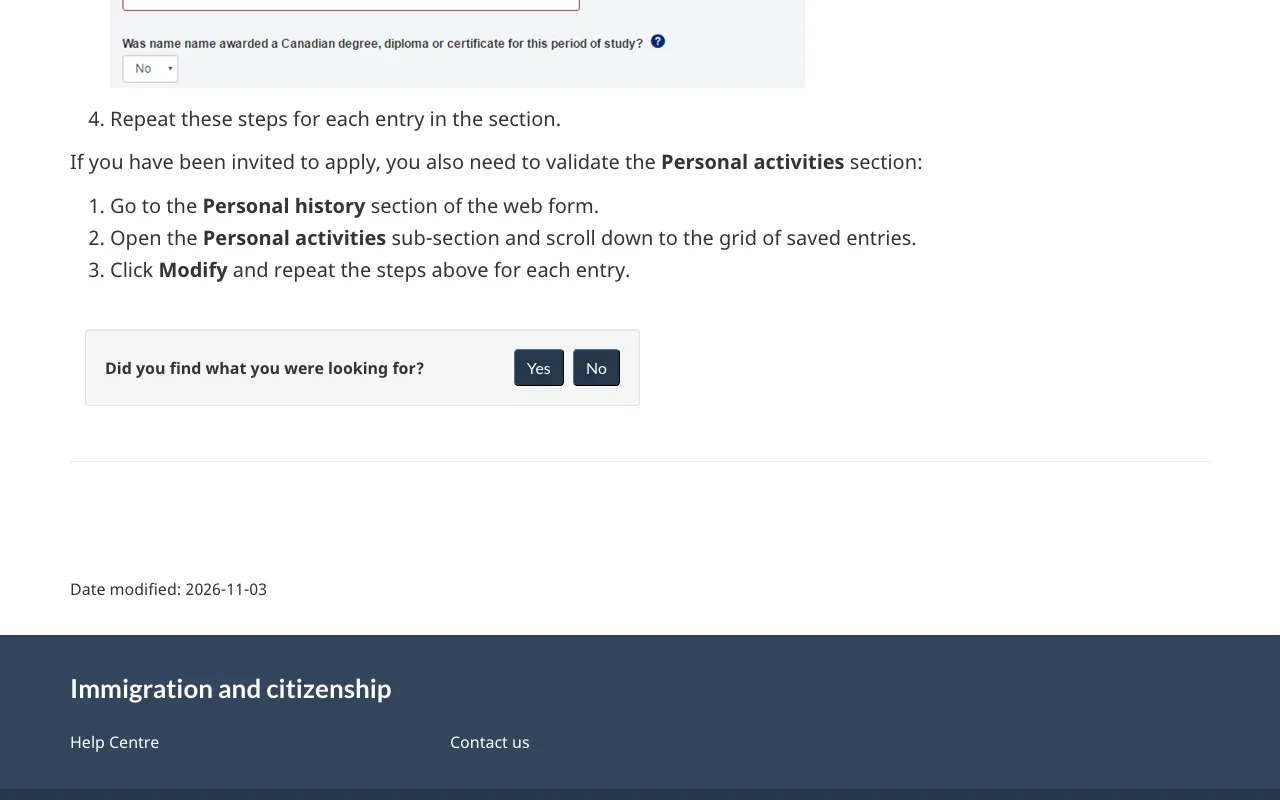
- 1 Personal activities
What they’re asking: Your activities over time, saved as one entry for each period.
Sub-section where each period of your activity is saved in a grid of entries. Open each saved entry with “Modify” and run the completeness check if the system shows errors. For an activity you are still doing, IRCC's general guidance is to use today's date or the signing date as the end date. Use your best guess if you don't know exact dates.
Study and languages
The education history carries over from the profile and can be checked again in the application. The e-APR must contain your ECA reference number (validated online) and, for Canadian credentials, the DLI number. Official source for Study and languages
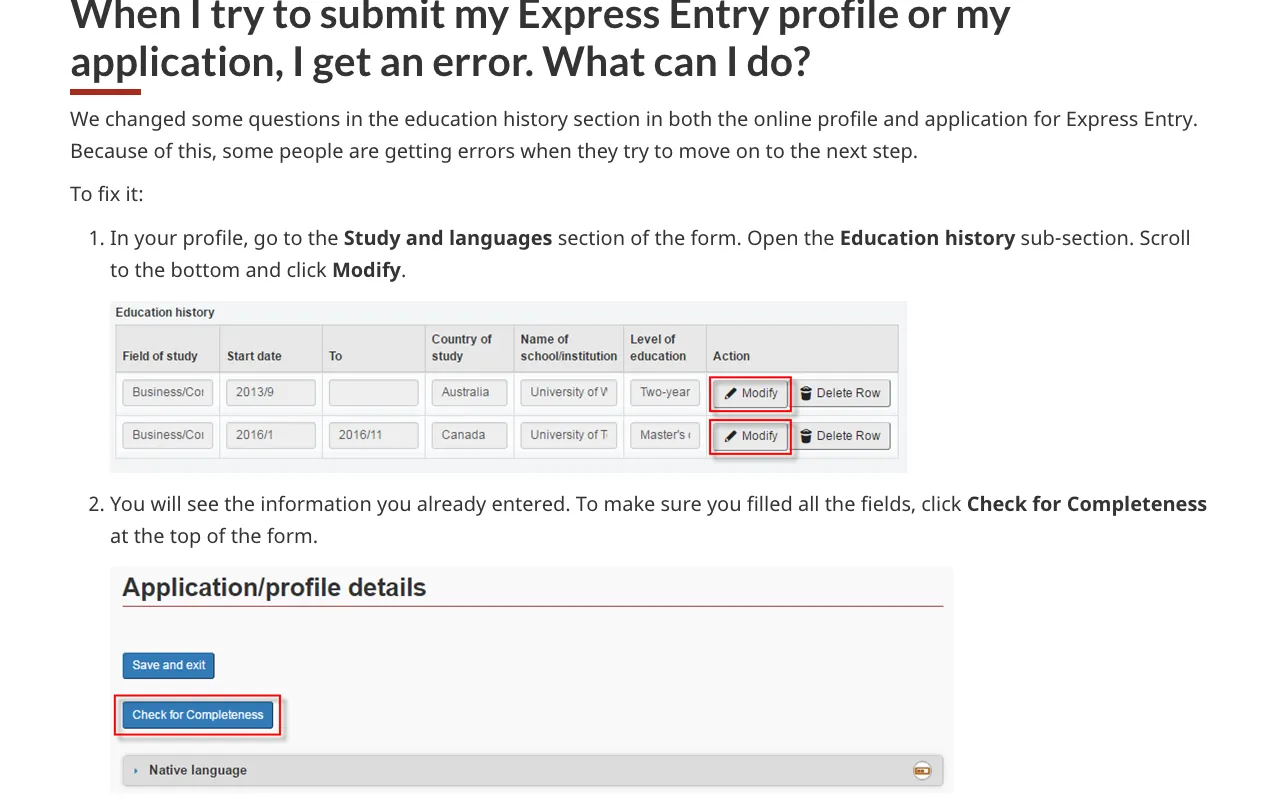
1- 1 Education history
What they’re asking: Your education entries, where you fix any errors the system shows.
If the system shows errors, open this sub-section, click “Modify” on each entry, use “Check for Completeness” and fix any answers shown in red.
Upload your documents
The personalized document checklist appears once the form is complete, with upload fields generated from your answers. That includes one field per declared job and country-specific police certificate fields. Letters of explanation and extra documents go in the optional section. Official source for Upload your documents
12- 1 Optional documents
What they’re asking: Where you upload documents that no other checklist field covers.
Section of the checklist for documents not covered by other fields, such as a letter of explanation or proof of implied status.
- 2 add letter of explanation
What they’re asking: The checklist option for uploading a letter of explanation.
Option in the checklist used to upload a letter of explanation into the Optional documents section.
Pay the fees
The system lists the fees owed and you pay online by debit or credit card. Amounts change, so check IRCC's fee list. Official source for Pay the fees
 123
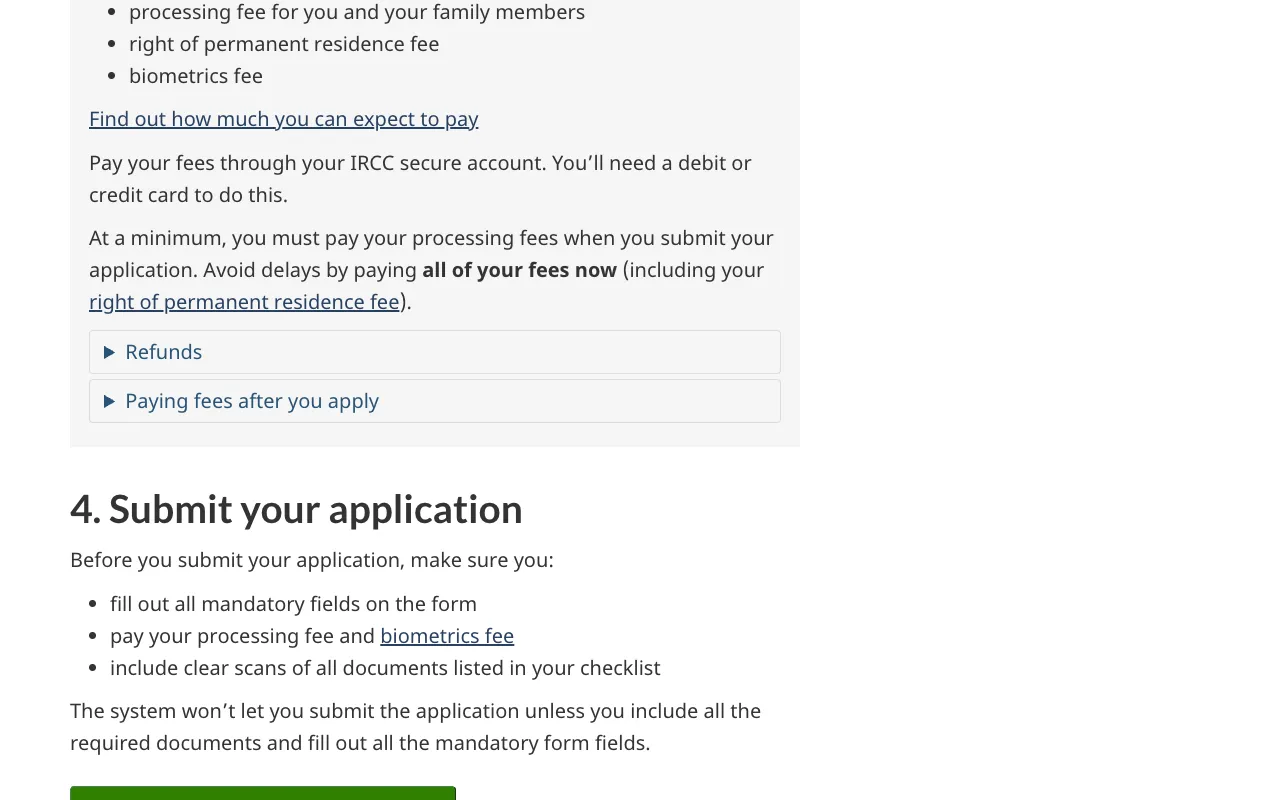
- 1 processing fee for you and your family members
What they’re asking: The fee to process the application for you and your family.
Must be paid at a minimum when you submit. It is refunded if the application is rejected as incomplete, but not once processing has started.
Official source for the field “processing fee for you and your family members”
- 2 right of permanent residence fee
What they’re asking: The fee for the right to permanent residence, payable now or later.
You can pay later, but IRCC recommends paying it now to avoid delays. It must be paid before IRCC can approve the application.
Official source for the field “right of permanent residence fee”
- 3 biometrics fee
What they’re asking: The fee for your biometrics (fingerprints and photo).
In most cases, pay it when you submit to avoid delays.
Submit your application
The system blocks submission until all mandatory fields are complete and all required documents are uploaded. After submission the application is locked, and you can upload only documents IRCC asks for (through “Check full application status” and then “View submitted application”). Official source for Submit your application
Permanent Residence Portal: Confirmation of permanent residence (in-Canada applicants, after approval)
How to confirm your status
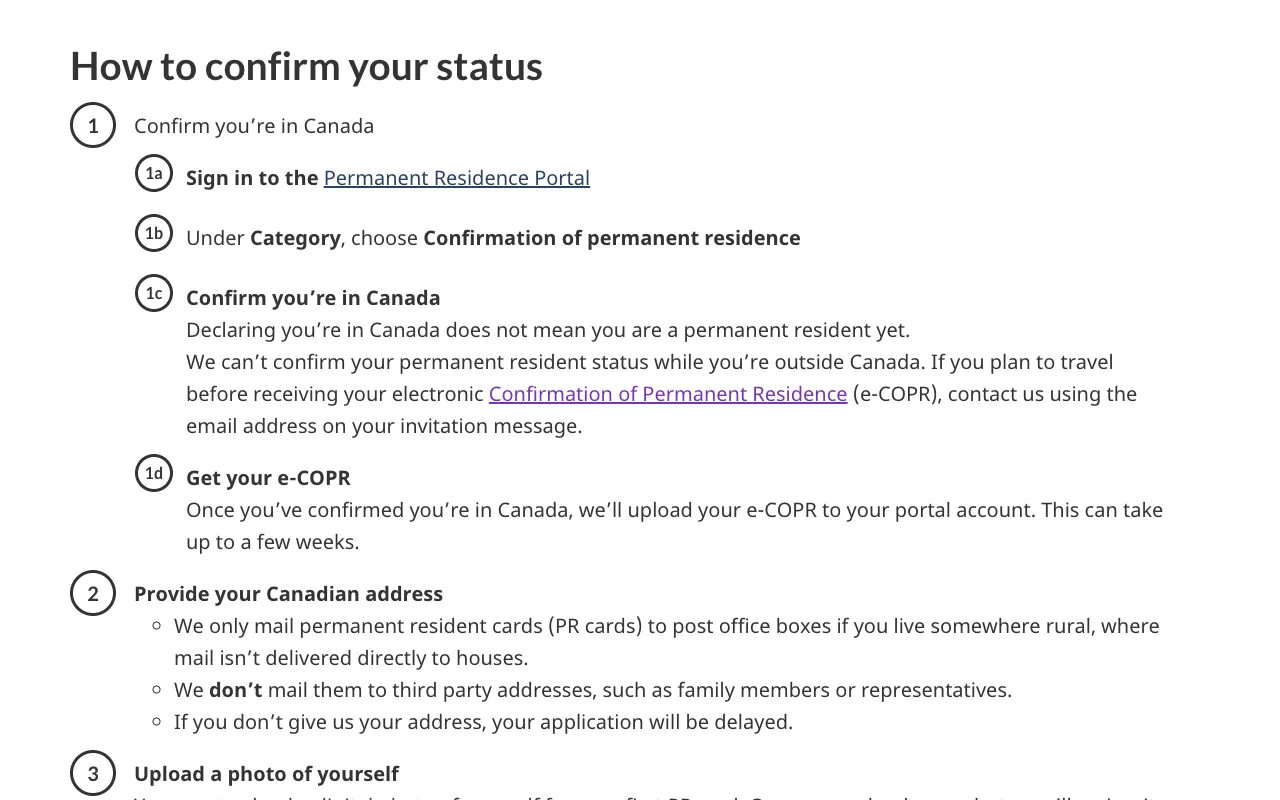
Express Entry applicants who applied through the IRCC secure account get a PR Portal account created for them and receive login details by email. In the portal you declare you are in Canada, get your e-COPR, give your Canadian address and upload your PR card photo. Official source for How to confirm your status
 1
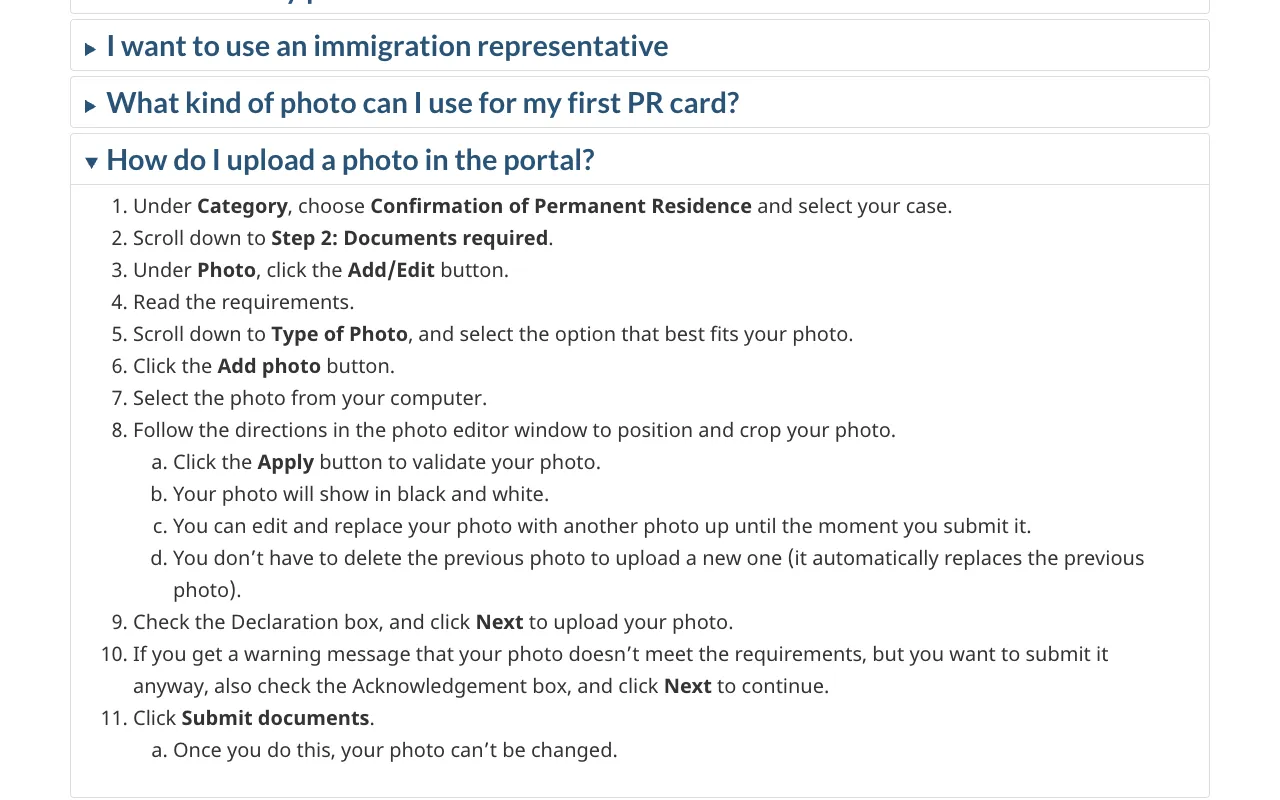 234567
- 1 Category
What they’re asking: The kind of task you want to do in the portal.
Choose “Confirmation of permanent residence” after signing in.
- 2 Step 2: Documents required
What they’re asking: The part of your case page where you upload your photo.
Part of your case page where the photo upload is found.
- 3 Photo
What they’re asking: Where you add your photo and crop it.
Click “Add/Edit”, read the requirements, choose the “Type of Photo”, click “Add photo”, crop it in the editor and click “Apply”.
- 4 Type of Photo
What they’re asking: What kind of photo you are uploading.
Select the option that best describes your photo.
- 5 Declaration
What they’re asking: A box you check before uploading your photo.
Check this box, then click “Next” to upload the photo.
- 6 Acknowledgement
What they’re asking: Do you want to submit a photo the system warned about anyway?
Only appears if the system warns that your photo may not meet requirements and you choose to submit anyway.
- 7 Submit documents
What they’re asking: The final button, after which your photo can't be changed.
Final button. After you click it, the photo can't be changed.
Watch out: Submitting a photo that IRCC returns, for example because it is too dark, the background isn't white, it has glare, or the size or measurements are wrong.
Mistakes IRCC warns about
- Giving false information or leaving out important details in the profile or application. IRCC can refuse the application, find you inadmissible and bar you from applying for 5 years. This applies to all documents, including language results, job offers and police certificates. Official source for this mistake
- Assuming a representative is responsible for errors. You are responsible for everything in your application even if someone else fills it out. Official source for this mistake
- Submitting an incomplete application (for example, a missing police certificate with no proof of best efforts, or a missing medical exam confirmation). It is rejected, fees are refunded, and you must create a new profile to be considered again. Official source for this mistake
- Applying with expired language test results or an expired ECA. IRCC refuses the application. Official source for this mistake
- Applying after your score has dropped below the round's cut-off, or after you stop meeting program requirements. IRCC says to decline instead. Applying anyway risks refusal without a fee refund. Official source for this mistake
- Letting the 60-day invitation window pass without applying or declining. The invitation expires and the profile is removed from the pool. Official source for this mistake
- Entering the wrong TEF Canada scores. IRCC says to use only the “Équivalence ancien score” column and may refuse applications with incorrect scores. Official source for this mistake
- Uploading certified true copies or unauthorized copies of police certificates instead of colour scans of the originals. Official source for this mistake
- Booking more than one immigration medical exam appointment. Official source for this mistake
- Not updating the profile when things change (a job offer, language test, marriage or divorce, a new child), or working in Canada without status while in the pool. Official source for this mistake
- Creating a second profile while the first is still active. Withdraw the existing profile first, or wait until it expires. Official source for this mistake
- Using a family member, your representative or a consultant to translate or certify your documents. Official source for this mistake
- In-Canada applicants creating their own PR Portal account or leaving Canada before PR is confirmed. IRCC creates the account, and status can't be confirmed while you are outside Canada. Official source for this mistake
After you apply
- IRCC checks the application for completeness. An incomplete application is rejected and the fees are refunded (see step 'After you submit').
- If you are 14 to 79, you get a biometrics instruction letter and have 30 days from its date to give fingerprints and a photo at an approved location.
- IRCC assesses eligibility and admissibility (medical exam, police certificates, background checks) and may ask for more documents or an interview through your account.
- Report changes (family, address, job, language results, nomination) using IRCC's web form. Upload requested documents through 'View submitted application'.
- Check your status in your IRCC secure account or the Application status tracker. Check IRCC's processing-times page for current timelines.
- If approved, pay any unpaid right of permanent residence fee. You then receive a COPR (and a permanent resident visa if needed).
- Outside Canada: land at a port of entry before the COPR's 'Valid to' date. Inside Canada: confirm PR in the Permanent Residence Portal, get your e-COPR, give your address and upload a photo. The PR card is then mailed to you.
Not covered here
- Provincial nomination streams and how to get a nomination (Official page)
- Provincial Nominee Program streams outside Express Entry (paper or portal applications) (Official page)
- Immigrating to Quebec as a skilled worker (Official page)
- Details of each category in category-based selection (Category-based selection)
- Full CRS points tables (Comprehensive Ranking System (CRS) criteria)
- Extending, restoring or bridging a work permit while in the pool or waiting (Official page)
- Country-by-country police certificate instructions (How to get a police certificate (by country))
- Other immigration programs (family sponsorship, refugees, pilots) (Official page)
- Life after landing (PR card renewal, residency obligation, citizenship) is covered by IRCC's permanent resident pages (Official page)
Official IRCC pages
- Express Entry (IRCC hub page)
- What has changed in Express Entry (November 3, 2026 CRS and job offer changes)
- Who can apply: compare the 3 programs
- Come to Canada tool (eligibility check)
- Find your National Occupational Classification (NOC)
- Check your CRS score (calculator)
- Comprehensive Ranking System (CRS) criteria
- Get your documents ready
- Create your profile and enter the pool
- Rounds of invitations
- Category-based selection
- Apply for permanent residence (after an invitation)
- After you apply
- If we approve your application
- Confirm your permanent residence from within Canada (PR Portal)
- Sign in to your IRCC secure account
- IRCC fee list (economic immigration, including Express Entry)
- Check current processing times
- Check your application status
- Find a panel physician
- How to get a police certificate (by country)
- IRCC Help Centre: Express Entry questions
- IRCC web form (report changes, add documents)
- Program delivery instructions: Express Entry completeness check (published for stakeholders)